Class hours: 9:40 – 2:05
Mr. Bohmann
wbohmann@ewsd.org
Today’s Notes
- Today is an EHS A Day
- EHS students are running on an alternative schedule due to SBAC testing. Does this impact you?
- A 3/4 11:25 AM – 1:10 PM
- A 1/2 1:15 PM – 2:35 PM
- meeting for all CVU seniors from CVU on Tuesday 5/17 at 11:00 in room M116 (Jack & Renzo)
- Ryan, SLC meeting on Wednesday, May 18th from 11:45-12:30, lunch provided
9:40 Attendance
9:45 Managing Multiple Scenes in Unity

Depending on the game you make, you might choose to develop a game with multiple scenes / levels. A scene in Unity is nothing more than a game object or better yet a collection of gameObjects.
While a game is running, scenes are loaded and unloaded under the control of scripts. A script can detect an event like a collision, change in health, or expired timer and decide it is time to move to a new scene.
When running your game, you’ll need to configure the Build Settings. All scenes that you want to manage under your scripts must be listed in the Build Settings area. To add scenes to the list, we just need to click and drag into the list. Let’s try it.
Using the Scene Manager to Change Scenes
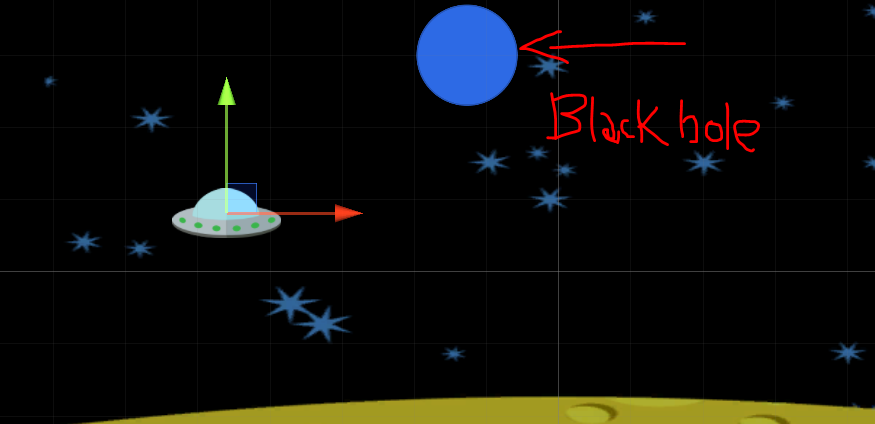
Let’s call this script – TransitionScript and place on an object with a Collider set to trigger. In my example, we’ll create a blackhole and place the script on this game object.
Unity scripts use a built-in object called the SceneManager to load and unload scenes. Any script that wants to use the SceneManager should first place the following “using” statement at the top of the source file, near the other “using” statements. This adds the SceneManagement library
using UnityEngine.SceneManagement;Now, when your script wants to change from one scene to another, it can simply call the SceneManager.LoadScene() function and pass in the name of the new scene.
SceneManager.LoadScene ("Level2");LoadScene() will automatically unload the current scene, destroying all objects in the Hierarchy. It will then load the new scene and create all of the objects in that scene’s Hierarchy.
One useful strategy is to set up a public string with a variable name for your next scene. Then in the Unity Inspector, be sure to type in the name of the scene you want to load. The name and case need to match.
//make a public variable for your next scene
public string nextScene;

void OnTriggerEnter2D(Collider2D other)
    {

        SceneManager.LoadScene(nextScene);
    }
There are many kinds of game events that might cause you to change scenes. A game might change scenes when a player dies, when objects collide, when a timer expires, or any other event that your script can possibly detect!
What we just practiced was a Single scene event. However, there are two ways to load scenes – in single mode or additive mode. In single mode, only one scene is loaded and visible at a time. All other scenes are automatically unloaded when a new scene is loaded in single mode.
When you call LoadScene() with just a scene name, as we have demonstrated, you are using single mode.
In additive mode, it is possible to load and display multiple scenes at once. Each scene may contribute something to the set of visible objects and overall gameplay. To use additive mode, simply add a LoadSceneMode.Additive parameter after the scene name in a call to LoadScene().
SceneManager.LoadScene (nextScene, LoadSceneMode.Additive);You can have multiple scenes loaded in additive mode, but only one of those scenes is active at a time. Let’s experiment.
10:35 Mask Break

10:45 English with Ms. Yopp

11:35 Game Studio Work time
This week you are going to take your Game Design Document and your Trello planner and begin the Analysis and Design stages of the production cycle.
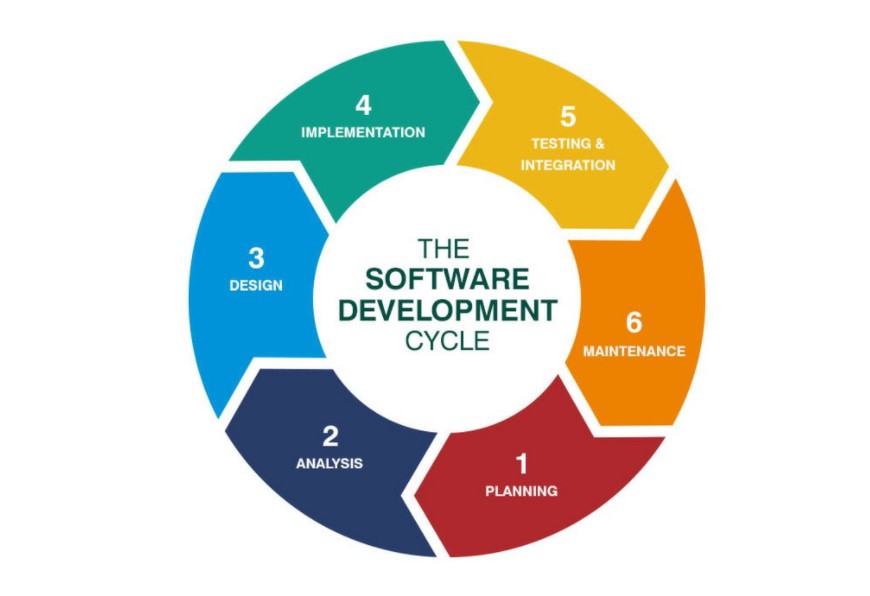
To get a better idea of your needs, I am going to circle around and meet with you to discuss game mechanics. By understanding your core game mechanic, we can best figure out what kind of coding will be required to help you get to a minimal viable product. We’ll also discuss your workflow.
Planning is such an important part of the software cycle. Discussions help to reveal the challenges and opportunities in your game. This is the basics of the Analysis and Design stage of your game.
Lastly, don’t underestimate the value of using the Asset Store, using ProBuilder and looking for models and game components on sites such as Polyhaven.
12:15 Lunch

12:45 Focus on Literacy

1:05 Mask Break
1:15 Production Time & Guided Support
CAWD Fun Games Studio work time (my fancy way of saying work with your game / game team
Unity Micro Lesson – Due Monday, May 23rd – Dropbox