Class hours: 9:40 – 2:05
Mr. Bohmann
wbohmann@ewsd.org
Today’s Notes
WEEK 37
- Welcome to Week 37
- June 9th is your last school day and Recognition Night
- ALL missing work turned in by this Friday June 3rd at 2:05. If you have missing work after this date you will start working with Mr. Curtis & Ms. Charron to make a plan to come back to school after summer starts (Friday June 10th and on). That would be a bummer
- Today is an EHS B Day
- Today @ 11am – Dan M. & Isaac Portfolio Presentations in m116
- Web Apprentice Certification Practice will continue this week – Test is June 7th
- Mini Lessons – Ashton & Dan A. – Wednesday morning
9:40 Attendance
9:45 Monday Mail – let’s see what everyone is saying….
9:45 Splash Screens, Credit Screens and Icons
A splash screen is shown when a game first starts. Splash screens will usually display some combination of graphics and text to introduce the game or show author and publisher information. A splash screen can also be used to hide the time that it takes to initially load the game onto memory.
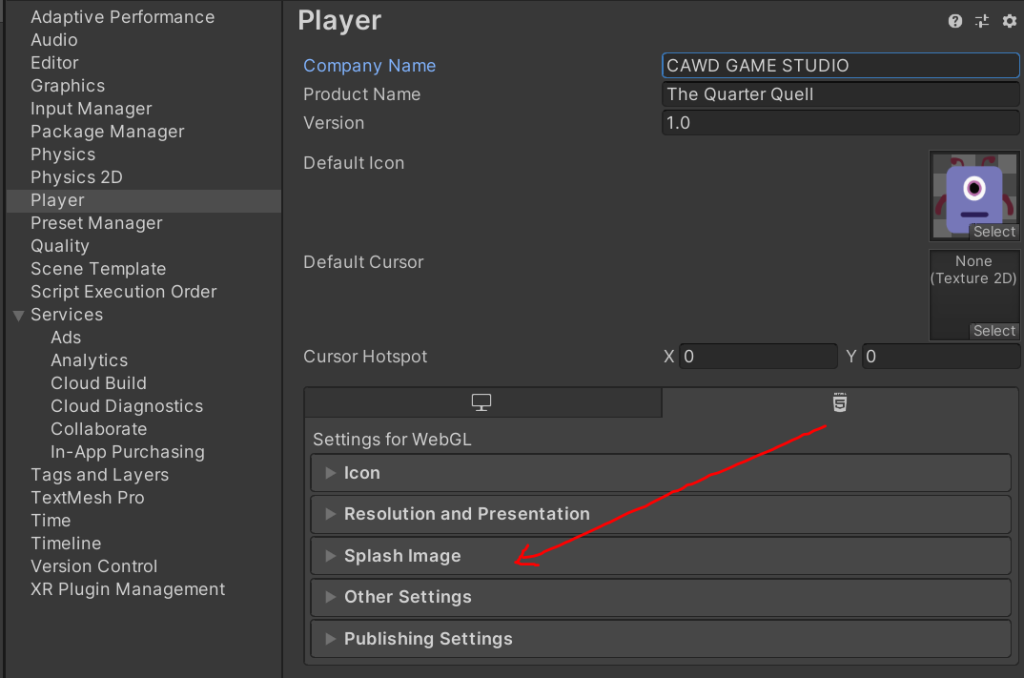
Unity has a default splash screen that is shown each time a Unity game is launched. The screen shows a “Made with Unity” graphic for a brief time. You will not see this screen until you have built your game for publication. If you published your game to simmer.io then you might have seen this splash screen.
You don’t normally see the splash screen until you build a game for publication. However, you can click the “Preview” button under the Splash Screen panel to see how your splash screen will look within the Unity IDE.
Game Icons
Every Unity game program has a game icon. This image identifies your program on the player’s computer or device. By default, Unity creates a small version of their own logo as your game’s icon. You will want to customize this icon to better identify your game. If publishing on the WebGL format, you will likely not have the ability to customize in the Icon area. It will use your chosen default icon.
Credit Scenes
In Unity it is very simple to create a rolling credit scene to honor yourself or your development team.
To create a credits scene, just create a new empty scene and add a UI Text object.
In the Text properties, add a line for each person to whom you want to give credit.
Then position the Text object so that the top of the control is at the bottom of the scene. This means that the Text object is not visible when the scene first loads. You can then write a script to slowly move the text object up the screen.
void Update()
{
 transform.Translate(Vector3.up * Time.deltaTime * 0.7f);
}
//This simple line of code will move the whole UI Text object up the screen each time
//Update() is called, many times per second. You can adjust the speed by making the
//numeric value at the end (e.g. 0.7f) larger or smaller.
Exiting or Quitting a Game
There is one last important consideration when publishing a standalone game. How do players exit
the program? When running in the Unity IDE, you can easily start and stop the entire game by clicking
on the “Play” arrow button above the Game tab.
However, regular players won’t have that option and are limited to the UI options you have included within the game.
None of our little mini games we’ve made have included any sort of “exit” feature that players can use to stop the game. You will commonly want to include a button on some scene that will allow users to exit the game. When that button is clicked, call the Application.Quit() function to cause the game to exit.
// this function can be called by a button click event
public void OnExit()
{
 // exit the game entirely if running as a standalone program
 Application.Quit();
}
10:35 Break
10:45 English with Ms. Yopp

11:35 Game Studio Work time
| Date | Week | Deliverable | Software Development Cycle |
|---|---|---|---|
| May 31st – Jun 3rd | Four | Prototype with game play | Testing/Maintenance / Publishing |
| June 6th | June 6th Game Jam |
This week you are going to take your Game Design Document and your Trello planner and begin the Testing & Integration Phase. We working towards game play and testing.
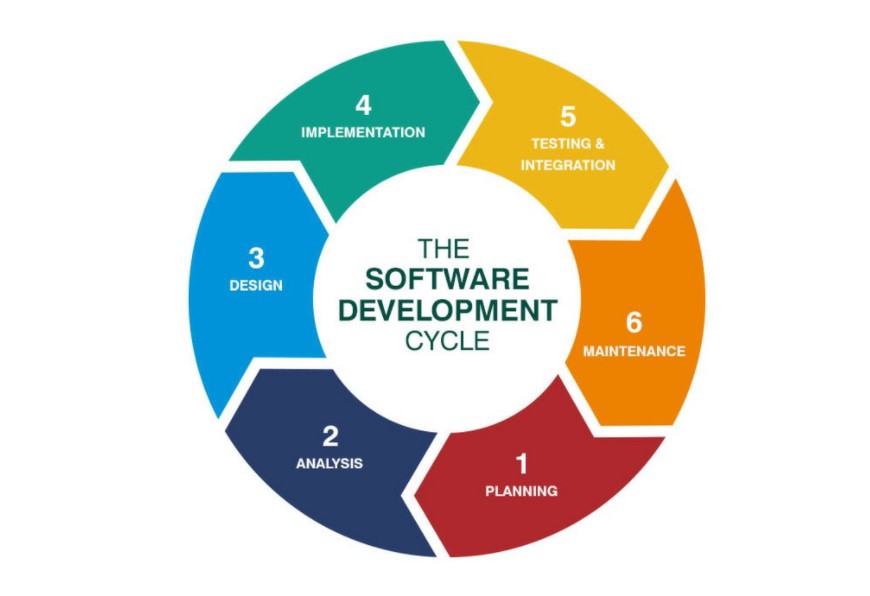
The testing & implementation phase is an essential part of the game development cycle. Testing or Quality Assurance includes careful planning, documentation of bugs and errors and follow up on the fixes that need to be made.
Before you start testing, it is a good idea to develop a test plan. The test plan details exactly what kind of performance tasks/tests need to be made. Basically, what are you testing? This might be the ease of use of the GUI, the core game mechanic, the story, user inputs and or the user experience.
Rather than ask a person to play your game and tell you what you think, consider creating some specific questions that you want feedback on. Remember when we did web testing? Same idea.
Larger projects may involve dozens of tests, especially when a new version or release is created.
Alpha testing is usually done by dedicated testers (the people who assembled the program)
Beta testing allows external people (outside the project) a chance to find problems the internal testers might have missed.
What kinds of questions can we ask our users feedback on? Can you think of some?
5 Minute Scrum Meetings / Update Trello Boards
Remember a good meeting is quick and on target. What am I working on today, What help do I need. Those are the questions you should be responding to in your group or individually.
12:15 Lunch

12:45 Focus on Literacy

1:05 Break

1:15 Production Time & Guided Support
CAWD Fun Games Studio work time (my fancy way of saying work with your game / game team
Outline of Performance / Game Testing Questions