Class hours: 9:40 – 2:05
Mr. Bohmann
wbohmann@ewsd.org
Today’s Notes
- Today is an EHS B Day
- Pennies, Pennie, Pennies
- #802PhonesDownHeadsUp Contest Page
- PE this week is in the Gym. Floor hockey, (bring sneakers)
- Next Week – you have class Mon – Wed. Off TH, FRI, Mon.
- We’ll be moving some computers on Wednesday over to Mr. Cronin’s Room.
9:40 Attendance
9:45 Unity – Animations and Adding Art & Intro to Arrays

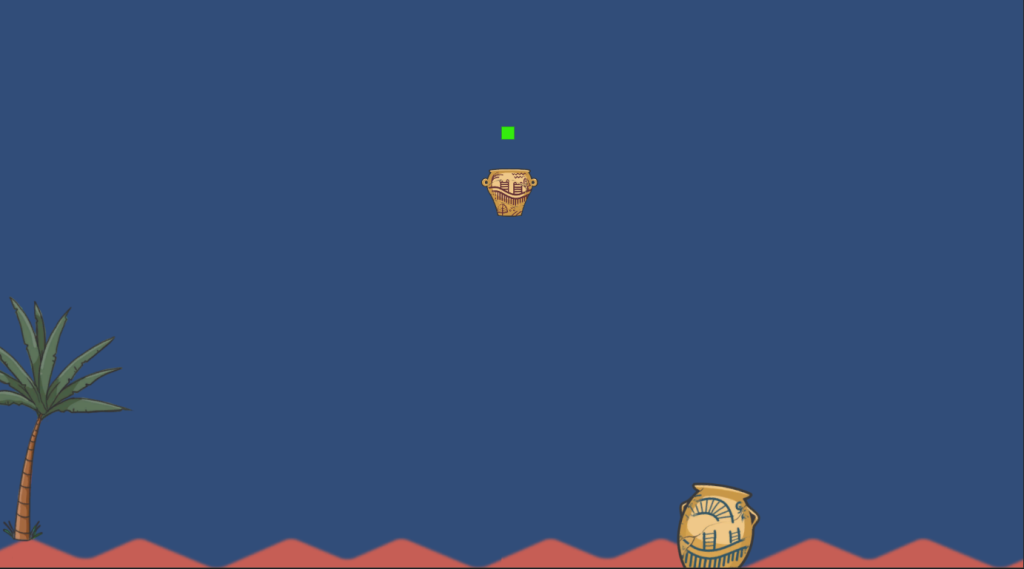
Adding Assets from the Asset Store.
One of the art assets in this project is a sprite sheet that’s used to animate the character. A sprite sheet is a single image file that contains multiple images. Using Unity’s Sprite Editor, you can split up the images into sprites that can be used throughout your project on any script or component that accepts a Sprite variable type.

Arrays allow you to store multiple variables in a single value and then access them with an index. For example, if you needed to store several strings that represent dialogue options in a role-playing game, an array might be an ideal choice.

To access an array element, you need to specify the name of the array with an integer index number in square brackets. An array’s index always starts at zero. So for example, to access the first element in the array, the syntax would be myArray[0]. The second element would be myArray[1], the third would be myArray[2], and so on.
Arrays can be used to store any variable type, including GameObjects, AudioClips, Animations, and many more Unity types.
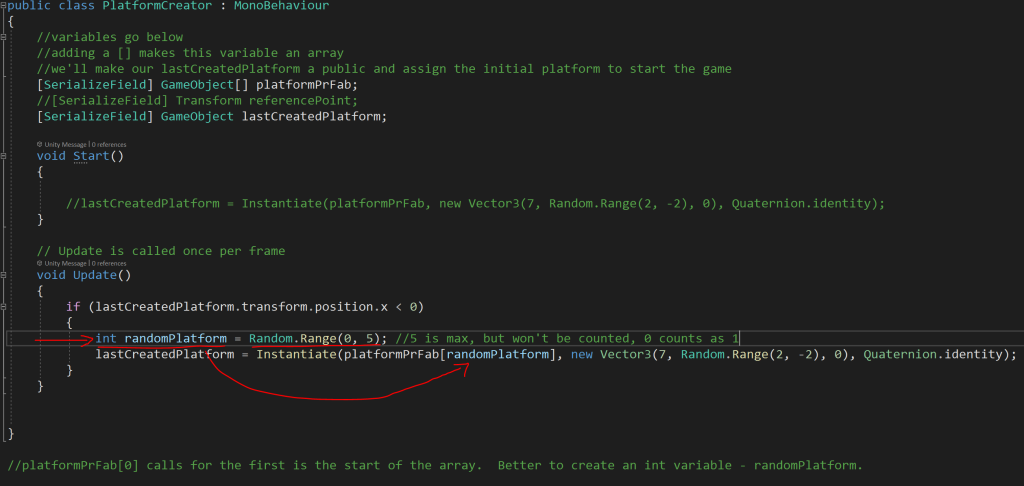
Arrays can be useful for creating exciting and replayable gameplay content that’s different every time, because a script can randomly choose an array index. Random numbers can be generated using the Random.Range() method. This method accepts two values that represent a minimum number and a maximum number (min and max). It also accepts integers and floats, and the behavior is different for each. When Random.Range() is passed two float values, the min and max are inclusive. When it’s passed two integer values, the min is inclusive but the max is exclusive. That means Random.Range(0, 10) will return an integer between 0 and 9.

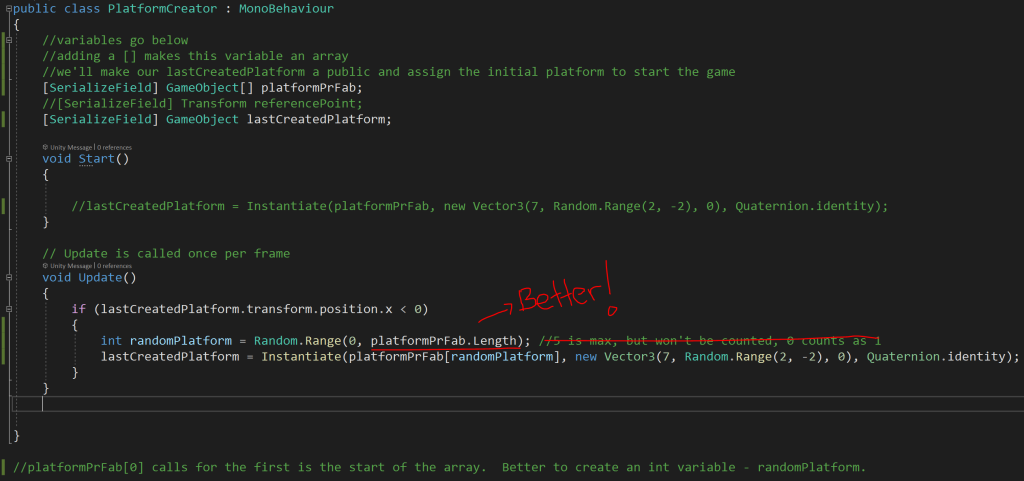
There is only one problem, everytime we update the number of platforms in the Unity Inspector, we have to go back to the code to adjust the range. Not best practice. So…
One solution is to use the length of the array as the maximum value for the random platform that is chosen. In code, you might say Random.Range(0, myArray.Length) and use the length property on an array as the upper limit of random numbers.

10:35 Mask Break

10:45 2D – Playing with Mass & Other Principles of Animation
(plus bonus round of Blender Special Effects for 2D)
Key Terms
Pose to Pose – method used for creating key poses for characters and then inbetweening them in intermediate frames to make the character appear to move from one pose to the next. Example the start of the ball on frame 1 and the squash of the ball on frame 13. The artist then draws the stages of the ball in between the frames.
Straight Ahead – method that uses only the first key pose of a character, and then continues drawing the character to create the desired motion. This technique is creative but does not always produce accurate results. Example drawing a ball and changing the drawing each frame until you reach your desired outcome.
Easing – refers to the way the motion is the animation is framed. Linear, ease-in, easy-out are popular methods. For the ball animation, we ease out as the ball gains speed and momentum.
Staging – is where you direct the viewers atendtion, could be the background, scenery, location and set up of your main character(s)
Twelve Principles of Animation
- Squash and Stretch
- Anticipation
- Staging
- Straight Ahead or Post to Pose
- Follow Through and overlapping action
- Slow in and slow out (easing)
- Arcs
- Secondary Action
- Timing
- Exaggeration
- Solid Drawing (identifying your object’s mass)
- Appeal
Let’s tackle three projects, we’ll set them up as scenes and then combine them using the Video Editor in Blender. Yesterday you made a ball bounce. What about other objects?
When creating a new scence – choose Full Copy, then delete what you need to delete. Rename your scene.
You are working with the grease pencil while in Blender. We’ll set up our projects in the 2D workspace.
Scene #1 will focus on using squash and stretch. Making a ball bounce as it falls off a shelf
Scene #2 will consist of a brick falling from a building, so focus on Mass
Scene #3 will be of your choosing (maybe a dropped fish, microphone, glass) – what principles do you want to use?
I’ll demo the saving and editing to the Video Sequencer. What about Audio? What About Titles – let’s do it.
Using the Blender Video Sequencer, organize the following scenes in one final .mp4
- Ball
- Brick
- Your Choice
Bonus for Audio and Title Cards!
Finished projects will be rendered as 2DPractice Scenes.mp4 (drop in the Classroom Dropbox)
11:25 PSA Worktime
11:50 PSA Last Looks Showcase
Viewport renders are ok. Include all facts, transitions, title cards, audio. 25 Seconds Max / Min.
Basically folks, the only thing left to do is to set up a final render. So before you render the final version, let’s take a look – a last look – at your PSA.
11:50 Last Looks Showcase – By Rows – Starting with Owen
- 25 seconds
- Audio
- Titles and Facts
- Viewport Renders are fine – all that will be left will be a final render!
LastLooks dropbox on Google Classroom – lastlooks.mp4
12:15 Lunch

12:45 Focus on Literacy

1:05 Mask Break

1:15 Production Time & Guided Support
Carnival Animation 2D, Due Friday – dropbox
2DPractice Scenes – Due Friday – dropbox
PSA Last Looks Showcase
Skills USA practice