Class hours: 9:40 – 2:05
Mr. Bohmann
wbohmann@ewsd.org
Week Thirty One
Today’s Notes
- Today is an EHS B Day
- Last week until vacation
- I am here today and tomorrow. Mr. Bisson will be here Wed – Fri. I am heading back to Wisconsin to see family.
- Day plans for the week will be posted Tuesday afternoon. The dayplan will be your guide this week.
- Emma, Garrett & Hayden – I need to know if you are in for Nationals.
9:40 Monday Mail

Make a quick check and see what everyone is saying… Also, keep an eye out in your inbox or check Spam for any communication from the Vermont Highway Safety Alliance
The VHSA does not let me know who is in the next round. Here is the process:
Up to twelve (12) finalists will be selected from the entries and asked to participate in Phase Two. Finalists will be notified by with instructions on how to proceed for Phase Two.
April 2023: Phase Two
The VHSA will set up an online voting link and finalists will have the opportunity to promote their video
on the social media outlet. This phase is for an additional “People’s Choice” award for an entry that
solicits the most votes from the public.
April 30, 2023 – Final contest winners will be chosen and notified on or before this date.
9:45 20% Showcase

Reverse Alpha order
Talking Points
- What did you do/learn about?
- How do you plan to use your new learning?
- Why / How can we use what you learned in our own work/projects/practice?
10:15am
The Game Developer’s Journal

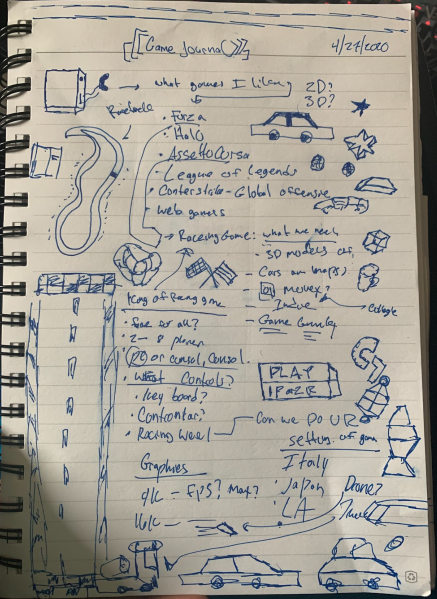
A Game Developer’s Journal is a tool to organize and record the development process of your own ideas and work. It’s like a diary for your game thoughts and ideas. Some people keep journals for business ideas, some for artwork, you get the picture.
Your journal can look like anything you want it to. The easiest route is to your first journal is to find a notebook, legal pad or bound stack of paper. Whatever you choose, protect it and personalize it.
You can include drawings, doodles, color whatever. Game developers & designers need to keep focused to move projects from ideas to execution. The journal is your collect-all and fail safe to ensure this happens.
As such, be sure you:
- Record all your ideas and state how you got them . What was your inspiration?
- Write about the challenges you experienced during the process and how you resolved
them. - Do not erase notes or entries, but revise and expand upon them .
- Add sketches and drawings to make things clear .
- Put a date each time you start a new entry. This will help you track progression.
- Jot down your ideas and sketch them out when appropriate . Sometimes it is easier to draw pictures that illustrate the connections between ideas, sequences, or events.
Your task: Create your very own Game Developer’s Journal and bring to class. Due tomorrow! for an easy, easy grade!
10:35 Break

10:45 English with Mx. Yopp

11:30 Working with Sprites

Sprites are simple 2D objects that have graphical images (called textures) on them. Unity uses sprites by default when the engine is in 2D mode. When viewed in 3D space, sprites will appear to be paper-thin, because they have no Z-width
Sprites can be made using a variety of programs. Last week we worked with Photoshop to create pixel art. Photoshop is a great place to make your custom sprites. In addition, Photoshop (if set up well) can be really handy for making animated sprite sheets and for viewing animations by placing layers in the photoshop video editor(Timeline) window.
Why sprite sheets? Simply, importing multiple sprites into Unity with a sprite sheet cuts down on file size and reduces heavy resource allocation. Imagine if you had a tiles for a side scroller and all of the tiles were imported as individual sprites? You’d have tons of files and a lot of space allocated for wasted pixels.
Setting up Photoshop
We’ll do a little math (math is fun).
- Create a new document
- Set width to 516 and height to 100 (be sure to choose pixels)
- We are going to make 5 columns, with height of 100px
- Now, lets add some math – we’ll add 4 px of padding to each divider line (16 pixels total)
- If we did a 10 column sheet, the width wouild be 1036 pixels but for today we are doing 5 columns
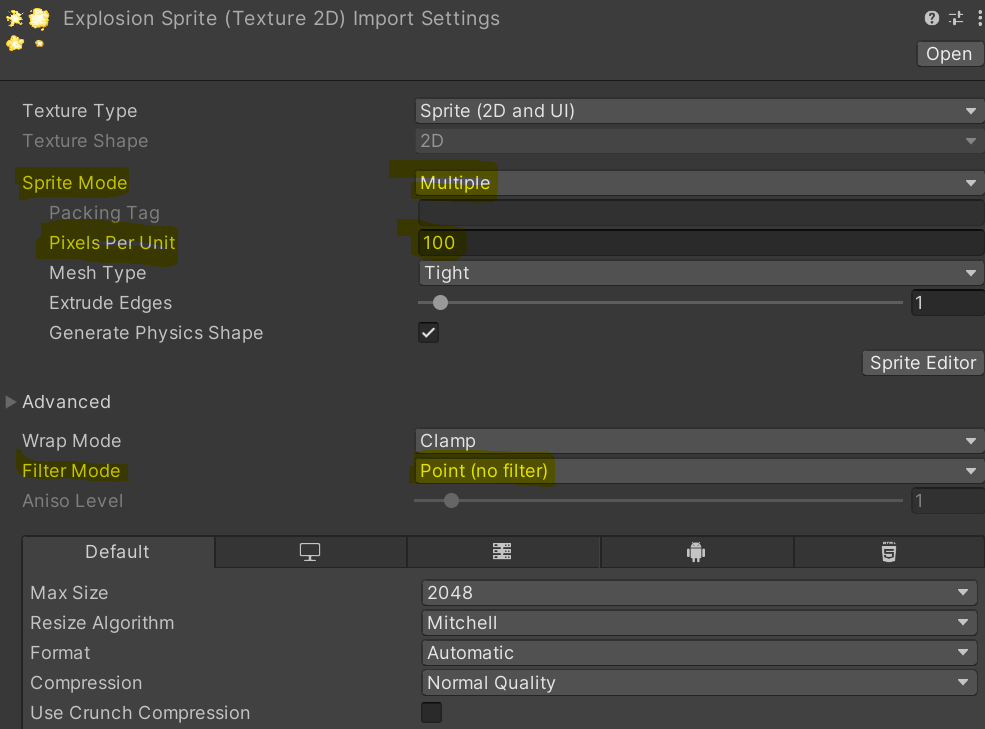
- Pixels per unit can be set at 8 / 32 / 64 / 100 / 128 /256
- Pixels per unit in Unity is how many pixels the sprite corresponds to one unit in your game world
- So that means the smaller the number, the larger the sprite. We’ll set ours to 100 as that is the default for Unity
- Set Background to transparent

Next
- View / Guides / New Guide Layout
- View / Show / Pixel Grid
- Preferences / General – change Image Interpolation to Nearest Neighbor instead of Bicubic
- Add a new layer for each box (new sprite)
- Add color to your background layer (layer1) to help you see your pixels (be sure to uncheck so you don’t export at the end)
- Build your sprites
When Exporting – be sure to…
- Export as PNG – 24
- Quality is set to Nearest Neighbor
- Give it a good name
Importing Sprites to Unity is easy. Import new asset into a Sprites folder. In order to use the sprites, we’ll need to let Unity know we have a sprite sheet and not a multiple sprite. Then we’ll go to the sprite editor and slice the sprites. We’ll do this together.

Activity: Create a 5 sprite, Sprite Sheet. Theme of your choosing. Upload your sprite sheet png to Google Classroom. Then, import your sprite sheet into the Game Programming project in a new scene.
The goal of this exercise is to Practice setting up a sprite sheet in Photoshop, practice making sprites, exporting and importing to Unity. Slicing using the Sprite Editor.
12:15 Lunch

12:45 Independent Reading

1:10 Break

1:20 Independent Project Worktime of Individual Support
- SpriteSheet
- GameDev Journal
- One Button Game Assignment
- 20%