Class hours: 9:40 – 2:05
Mr. Bohmann
wbohmann@ewsd.org
Week Twenty One
Today’s Notes
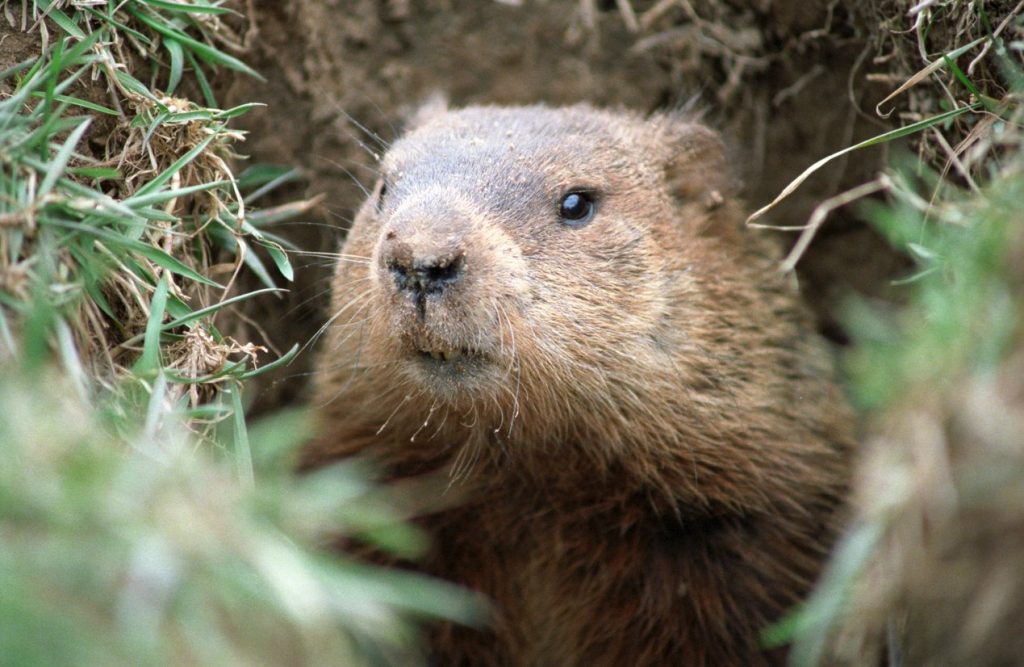
- Groundhog Day
- Today is an B Day for EHS students
- Visitors today @ 11:05 – We have one (10 minute rotation)
- PE is in the Gym today at 1:15pm
9:40 Attendance
9:45 A quick word on…
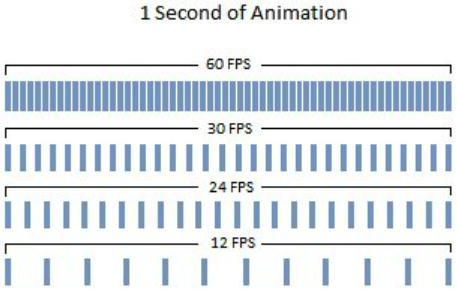
Keyframing is a fundamental skill in animation. To make a sequence have motion, objects move through frames – 24 frames by traditional animation standards all the way up to 60 fps (frames per second) for multimedia presentations. Most modern animations are 60 FPS.
Points of action, rise, fall, speed, direction all happen between the keyframes. A keyframe is a location on a timeline which marks the beginning or end of a transition.
Running: Yesterday we animated on the 1s at 24 fps for a fast run cycle that cycled twice. If you want to slow your runner down, animated your keyframes on the 2’s and you will get one complete cycle (right and left)
Walking: we did a nice confident walk on the 3s. If you want to slow your character down, consider changing to 4s or 6s. You might have to adjust your poses accordingly.
Want to see the difference between 15fps and 60fps – Check this out
When we do the PSA video we’ll switch to 30 FPS for a nice smooth animation.
9:50 Camera Rig Add On (Micro Lesson)
Blender ships with a Camera Rig Add-on which includes a lot of functionality and is pretty easy to set up and use. You’ll get access to a dolly rig, crane rig and 2D rig. Blender Documentation
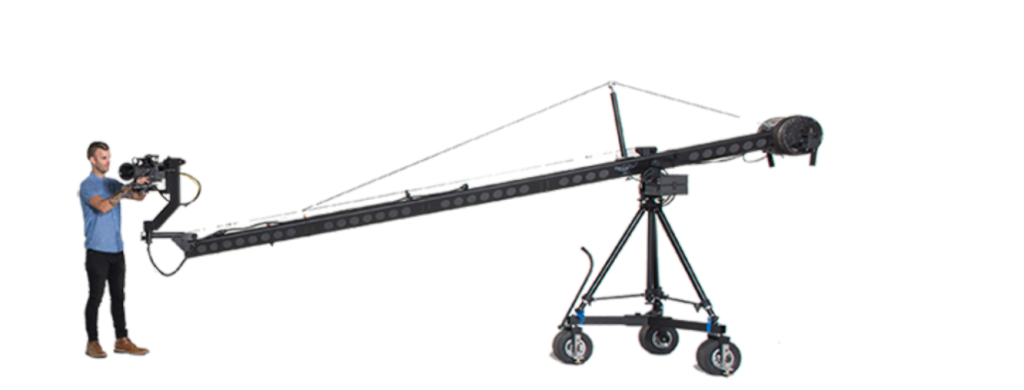
What is a camera rig? A camera rig is any piece of equipment used to add a special feature or to enhance the functionality of your camera.
Times when you might want a rig:
- When You want to create interesting angles or action
- When You want to create smooth sliding motion
- When you’re trying to capture movement or create movement
- When you want to track a shot as it moves through your scene
Let’s set up a scene and learn how to use the rig. Can you think of some ways to use this type of camera?
10:10 Three Point Lighting (Micro Lesson)
Lighting in and of itself is really a skill and an art form. When working outside with our cameras we had little control over lighting but had a lot of control on where we move ourselves or our subject.
Studio photography provides an opportunity to set up lighting for different types of effects, mood and composition.
In a modeling program like Blender, we can design all kinds of light set ups and we can even have our subjects emit light. Plus, all of lighting choices can change with a bit of keyframing.
Three Point Lighting is not a concept we were able to tackle in photography. However, we can easily understand and see how it works in Blender.
The important thing to remember in Blender is anything can be a light!
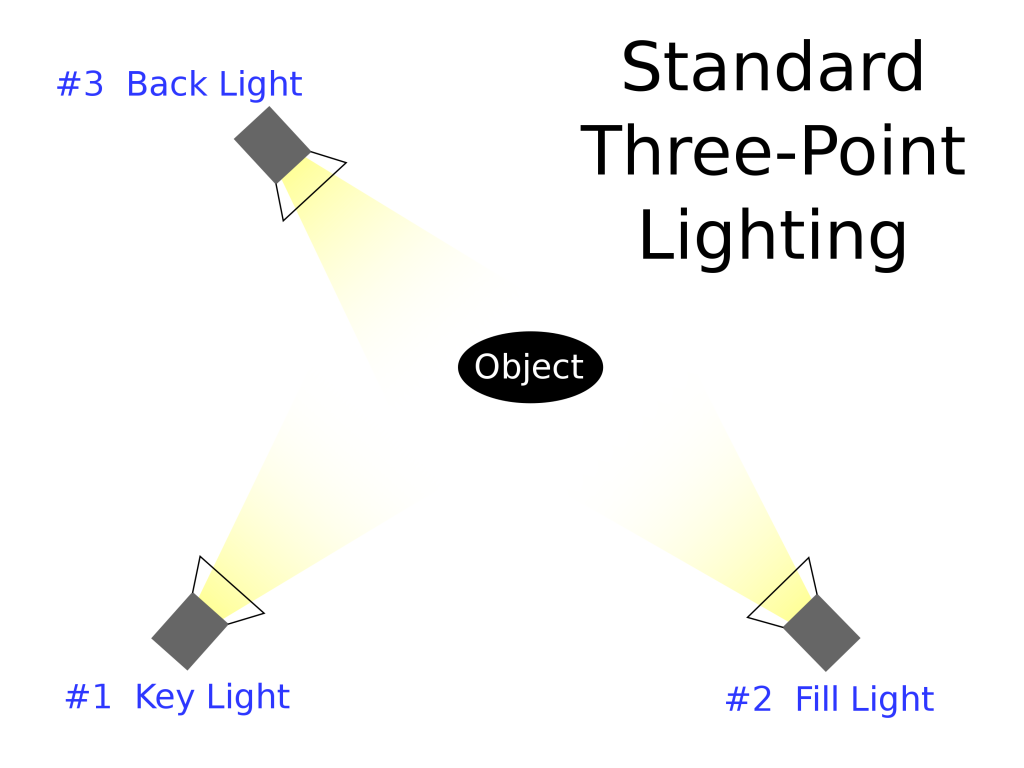
Three Point Lighting is a technique that includes three types of light positions.
- Key Light – which servers as your principal illuminator and is usually your strongest light
- Fill Light – which is often placed lower than the key light to balance out the shaded surfaces (often half the value of the key light)
- Back Light – whose primary purpose is to top or back light the subject and provide a rim of light. ( good strategy is to point this light back towards your fill light
Position of lights can provide mood (shadows on subject, lighting from below, silhouettes, etc…). Lighting is an art – and experimentation is important to setting up a good render.

10:45 -A Brief Look at how animators animate!
We’ll look at a clip from School of Rock and then watch how a professional animator uses video, the grease pencil in Blender to create an animation reference from an audio clip.
The video references are from a course titled Character Animation in Blender by David Andrade hosted by LinkedIn Learning.
11:05 -Block Character Worksession & Visitors!
- Emmit / Eric
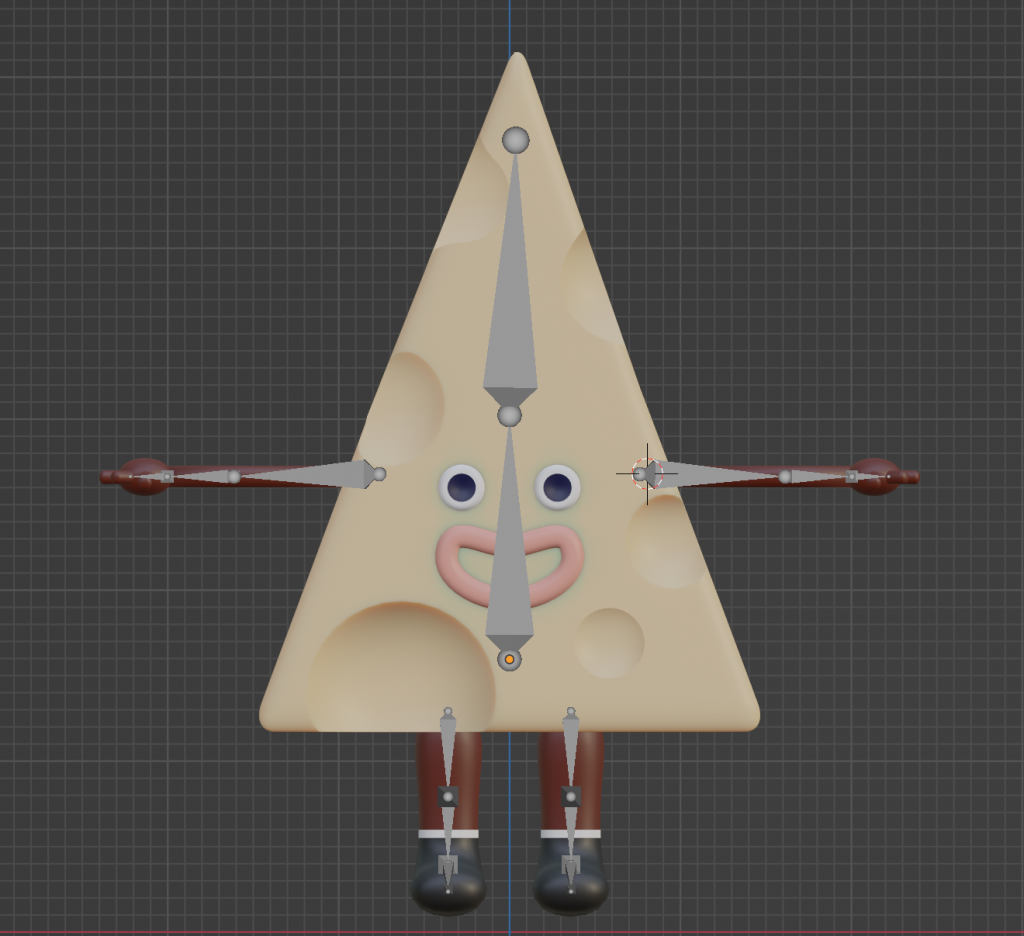
The rest of us….Working with your Custom Character (from block modeling) – there is a good chance your character will require weight painting after rigging. Depending on your geometry, this might be challenging or easy. You may need to add more geometry to your mesh too.
The primary goal is to have a rigged character using IK controls.
- Apply walk or run cycle or other movement using IK and poses (pose library is helpful)
- Your character will need some staging, lighting and some camera(s).
- Render in Eevee (do some test renders)
- You can use materials from BlenderKit or make your own
- Filename:Lastname_CustomCharacterMovement.mp4
- Due: Wednesday, February 8th
10:35 Break
11:35 3D Animation Project – Mood
Now that we’ve got a walk and run cycle in our Asset Browser, it’s time to add some other actions.
Pick Three
- Mopey & Sad
- Limp
- Sneaky
- Strut
- Waddle
- Prowl
- Other
Set Up lighting, camera and some simple staging. Each pose should animate for 5 seconds.
Render to a final .mp4 for a total of 15 seconds.
Filename: Moods_Demonstration.mp4
Tip, save each as a new scene. Then use the video editor to pull your scenes together.
Due: Monday, February 6th.
12:15 Lunch
12:45 Literacy in Practice

1:10 Break
1:20 20% Production Time & Guided Support
- We have two active projects:
- 1. 3D Animation – Mood – Due Monday, February 6th
- 2. Custom Character moving with IK controls – Due Wednesday, February 8th
- 20%