Class hours: 9:40 – 2:05
Mr. Bohmann
wbohmann@ewsd.org
Week Twenty Two
Today’s Notes
- Today is an EHS A Day
- Visitors – we have visitors from SBHS (10 minute rotations)
- 10:05 1 Visitor | Finn / Asa
- 11:05 1 Visitor | Hayden / Tom
- English will be moved to 11:30 today to accommodate our visitor schedule
- Tom – Hirability Meeting on Friday at 10:30 with Melinda – add to your schedule
- SkillsUSA – What Skills USA contest are you interested in
- Let’s do an intake on your interest and skills
- Review of Story Arc by studying the Road Runner
- Exposition (setting)
- Rising Action (main conflict of the story)
- Climax (the big event)
- Falling Action (what happens after big event)
- Resolution (ending, how does it wrap up)
9:40 Attendance
9:45 Unity

Why Unity? Unity is a powerful 3D development tool for mobile and desktop games, real-time simulations and visualizations and even short films. Unity uses C# for scripting and Unity recently purchased Bolt for visual scripting. We’ll use a combination of prebuilt scripts, assets from the extensive asset store and we’ll write our own C# scripts for our own games. Unity Sizzle Reel.
Our first steps with Unity will be to download the Unity Hub. The Hub is where all projects begin. We will be using the free version of Unity.
Download Unity Hub only if your computer does not have the Unity Hub. Check to see in the finder.
Do not create an account. Use your school gmail account to sign in and create a new account. Unity changes their interface constantly so we’ll see what we run into.
We are opting for a personal plan – free version. I’ll give you a license to give you more access. Make sure you are signed in with your ewsd gmail. That’s it for now.
You can upgrade your license – see your preferences (behind the gear) in Unity Hub. The license is posted in Google Classroom.
10:00 Character Rigging for your custom character and/or Modeling time for PSA

Use this block of time to work on your Custom Character rigging and walk / run cycle – due tomorrow. We will watch your character so use your time today efficiently. See Google Classroom for submission and naming details.
and / or work on your PSA asset modeling.
Students with visitors, prepare for your visit
10:35 Break

10:45 Texture Painting and Stenciling Graffiti

Let’s look at the workflow and process of texture painting and stenciling. Let’s start by reviewing texture painting and then introduce the stenciling workflow. You can get some nice stencils but they must be transparent to work well! This site – stickpng has some nice stencils to grab.
What’s more is there are additional options to add depth/height to your texturing and stenciling. Let’s play with that too.
The rough workflow….
| Texture Painting | Stenciling |
|---|---|
| Make Mesh | Make Mesh |
| Go to Shading / make new image texture node | Go to shading / make new material. Black is a good choice |
| Make New Image Material / Save | Link image to Base Color |
| Link image to Base Color | Switch back to texture paint |
| Select your object | open texture properties menu in properties |
| Switch back to texture paint | Add Image (pick out your stencil) |
| Paint away as you like | Change from tiled to clip |
| Go to Active Tools menu / Go to Texture dropdown | |
| Switch from tiled to stencil | |
| Choose White for your brush – for best results | |
| Right click to move, shift right click to scale / then paint |
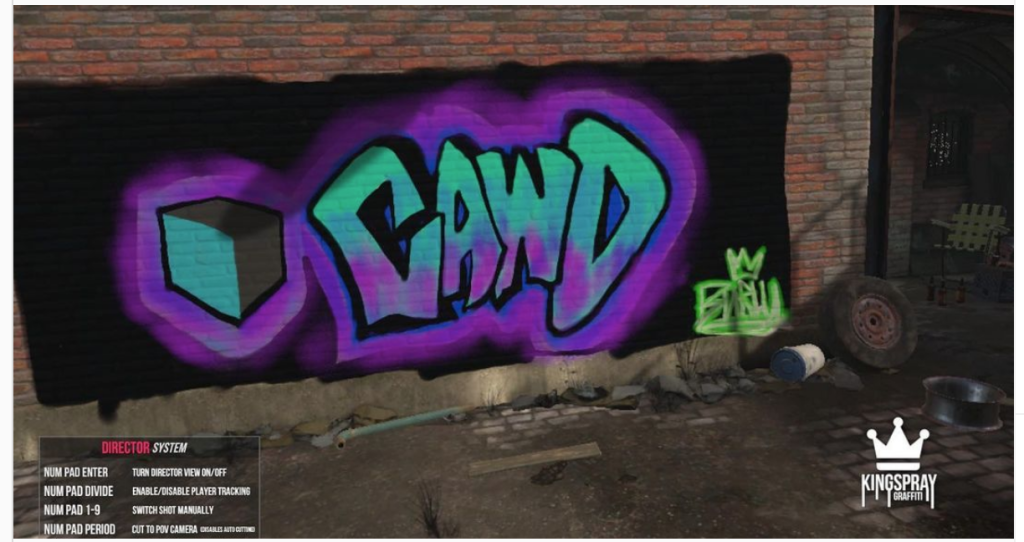
Let’s tackle a grafitti wall based on your new skill set. To get started, we are going to need some image assets to help out: Some Suggestions….
- Brick Wall
- Rusty image
- Weeds
- Cawd Logo (in Public Folders)
- and any other paintable image texture you are after.
- A graffiti idea
Set up some nice lighting for a nice final image render. Drop in CAWD2 Dailies so we can see your graffiti creation.
11:05 Students with Visitors
11:30 English with Mx. Yopp

12:15 Lunch

12:45 Literacy in Practice

1:10 Break

1:20 20% Production Time & Guided Support
- Asset Modeling for PSA
- PSA message planning
- Character Rig Animation due tomorrow
- 20%