Class hours: 9:40 – 2:05
Mr. Bohmann
wbohmann@ewsd.org
Week Thirty Four
Today’s Notes
- Today is an EHS B Day
- Emma and Garret – CWE on Thursday at 11:10am. Ms. Knight will take you. You’ll be back by lunch time.

- WorkKeys Update

The next 2 Wednesday’s will be different in CAWD. On May 17th and May 24th we will be doing WorkKeys post-testing for CAWD 1 and select CAWD2 students
Students testing on Wednesday the 17th of May:
You’ll report to CAWD (Mr. Cronin’s classroom:
- Lamotte
- Noble
If your name is not listed above – you do not come to CAWD on the 17th.
Questions?
9:40 Practice Test – Web Professionals
Do 50 questions then move on….
9:55 Game Studio Work Time
Start with a 5 minutes Scrum Meeting (group or individual)
- What are you working on?
- What will you complete today?
- What help do you need?
Update your Trello Boards (5 minutes) and / or add to the details of your Trello board.
At this point you should have your game design document drafted and know the core of your game and your core game mechanic. Now is a good time to do some game planning (storyboarding, analog level design) and asset creation. Does your game design match your Game Design Document. Remember you should be in prototype / blockout / grayboxing mode.
Next week you’ll tackle your core game mechanic. So if running, jumping and movement is at the core of your game, you should be able to do that by the end of next week. If your core mechanic is shooting, then by Friday of next, your game now is shooting and that mechanic is working.
Question? How will you know when your game is done? Ask yourself and your group what the bare bones deliverables are. That way you know what you are working towards.
Don’t be surprised if I ask you this question
10:35 Break

10:45 English with Mx. Yopp

11:30 Managing Multiple Scenes in Unity

Depending on the game you make, you might choose to develop a game with multiple scenes / levels. A scene in Unity is nothing more than a game object or better yet a collection of gameObjects.
While a game is running, scenes are loaded and unloaded under the control of scripts. A script can detect an event like a collision, change in health, or expired timer and decide it is time to move to a new scene.
When running your game, you’ll need to configure the Build Settings. All scenes that you want to manage under your scripts must be listed in the Build Settings area. To add scenes to the list, we just need to click and drag into the list. Let’s try it.
Using the Scene Manager to Change Scenes
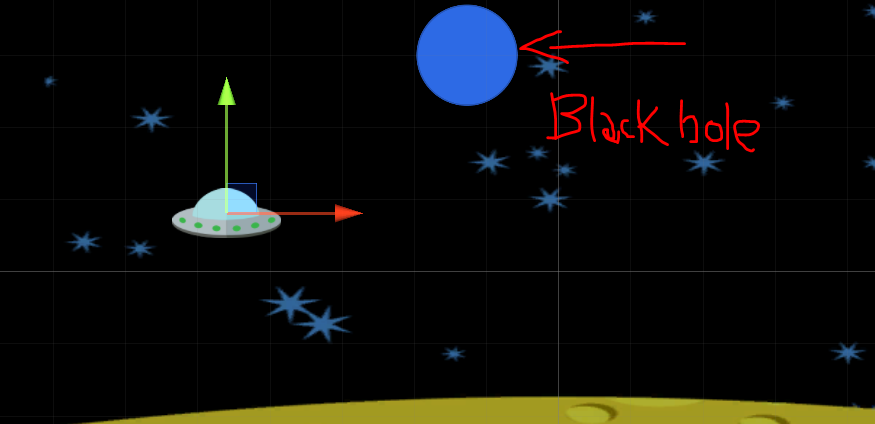
Let’s call this script – TransitionScript and place on an object with a Collider set to trigger. In my example, we’ll create a blackhole and place the script on this game object.
Unity scripts use a built-in object called the SceneManager to load and unload scenes. Any script that wants to use the SceneManager should first place the following “using” statement at the top of the source file, near the other “using” statements. This adds the SceneManagement library
using UnityEngine.SceneManagement;Now, when your script wants to change from one scene to another, it can simply call the SceneManager.LoadScene() function and pass in the name of the new scene.
SceneManager.LoadScene ("Level2");  //refers to the scene name
or
SceneManager.LoadScene (1); //refers to the build indexLoadScene() will automatically unload the current scene, destroying all objects in the Hierarchy. It will then load the new scene and create all of the objects in that scene’s Hierarchy.
One useful strategy is to set up a public string with a variable name for your next scene. Then in the Unity Inspector, be sure to type in the name of the scene you want to load. The name and case need to match.
//make a public variable for your next scene
public string nextScene;

void OnTriggerEnter2D(Collider2D other)
    {

        SceneManager.LoadScene(nextScene);
    }
There are many kinds of game events that might cause you to change scenes. A game might change scenes when a player dies, when objects collide, when a timer expires, or any other event that your script can possibly detect!
What we just practiced was a Single scene event. However, there are two ways to load scenes – in single mode or additive mode. In single mode, only one scene is loaded and visible at a time. All other scenes are automatically unloaded when a new scene is loaded in single mode.
When you call LoadScene() with just a scene name, as we have demonstrated, you are using single mode.
In additive mode, it is possible to load and display multiple scenes at once. Each scene may contribute something to the set of visible objects and overall gameplay. To use additive mode, simply add a LoadSceneMode.Additive parameter after the scene name in a call to LoadScene().
SceneManager.LoadScene (nextScene, LoadSceneMode.Additive);You can have multiple scenes loaded in additive mode, but only one of those scenes is active at a time. Let’s experiment and see what works and what problems we run into.
On Thursday, we’ll look at setting up a SceneManager to handle multiple scenes additively. This can be really useful when you have things like player health, damage, scores, inventory, etc.. that need to be carried across multiple levels!
12:15 Lunch

12:45 Independent Reading

1:10 Break
1:20 Independent Project Worktime of Individual Support
- Overdue Work
- Game Design Document
- Dissect Your Favorite Game