Class hours: 10:05 – 2:45
Mr. Bohmann | wbohmann@ewsd.org
10:05 Today’s Notes & Attendance

Hey, Welcome to Friday!
You have a Three Day Weekend in observance of Memorial Day
Equipment – Please return on Tuesday when you get back to school. Laptops and any other items you borrowed.
EHS will be holding their Hullabaloo student activity today in the front of the school starting at 12:20pm and ending at 1:50pm – Admin asked us to change our lunch in response.
10:10 Cinemachine – The Camera with Brains

Let’s look at a smart camera – called Cinemachine Virtual Camera
Cinemachine is a powerful camera that we can use to track our player (or Transform GameObject). There are more controls with the Cinemachine Virtual Camera than the main camera. They work together. So instead of writing a Camera Follow Script (like I did with the CAWD Rollerball game I started last fall) we’ll use the Cinemachine add on from the Unity Registry.
Cinemachine is all about creating complex movements simple. Cinemachine does not replace your normal camera, instead it works on top of it. It is the brain for adding and controlling other cameras. We’ll start by adding the Cinemachine Brain to the Main Camera if it is not there already.
We’ll look at some basics – specifically Body and Aim which are directly related to Follow and Look At.
We’ll also look at Dead Zone and Soft Zone and some other Aiming tips.. By default,, the setup is at 0. But let’s play with it so we can consider how we might use this with other games. We’ll also look at offset and dampening.
The Dead Zone – when your character is inside, the camera will not move at all
The Soft Zone – is the area where the camera will begin to follow your character and it defines the edge to where the camera will go
Damping will reduce the speed by which it tracks the character
With Cinemachine you can create multiple cameras and set up cut shots. However, we won’t tackle that today. Let’s just start with some basics. Here is a nice set of reference tutorials about using Cinemachine and a stellar YouTube video.
You can use the Cinemachine camera with 2D as well. Having the Cinemachine camera takes out a whole bunch of coding. That can be nice.
Let’s do a run through with the Cinemachine. To get started, add this to your assets from the asset store: Third Person Controller – Basic Locomotion FREE

11:00 Dissecting your Favorite Video Game

Presenters: John, Philip, Finn
When presenting: Three Questions to respond to:
- What is your game
- How does or does not your game tackle the 5 core principles of good game design
- Select 1 principle that really stands out to you
Core Principles of Good Game Design (and level design)
- Design your game around a core mechanic
- Make your games easier at the start and increasingly more difficult
- Create Options & Different Views (change up the scenery & Balanced gameplay)
- Feedback and Rewards
- Meaningful Core Mission
11:20 Game Studio Work Time
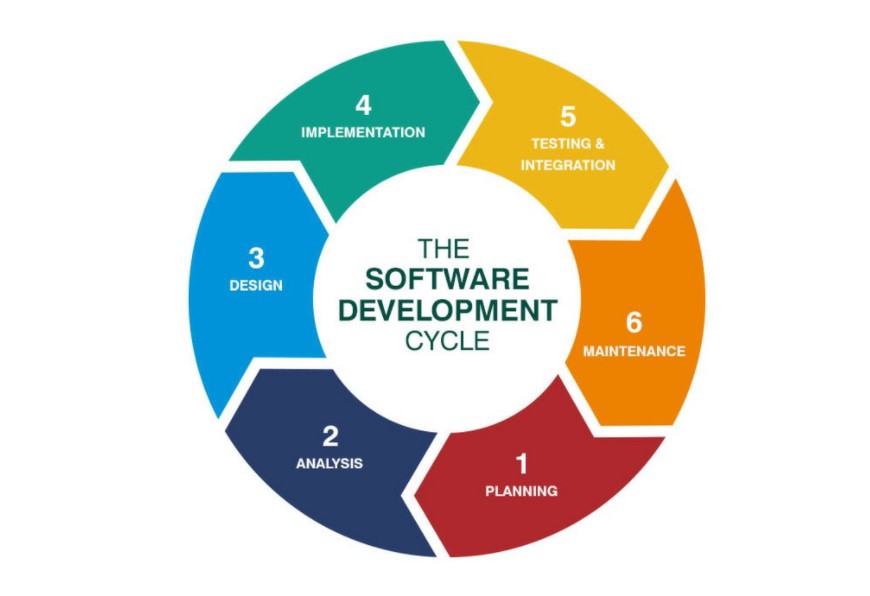
We are at the point where you are going to take your Game Design Document and your Trello planner and begin the Design and Implementation stage. You should be into coding your game mechanic if not done already, adding design elements and some game play!

The design phase is where requirements are transformed into concrete, detailed plans to help you write code. Given certain requirements, there could be many possible approaches to meeting those requirements. A design document will describe exactly how the program will be written, including details such as:
- How your player needs to move
- What kinds of input and output need to be displayed on the screen
- How many levels / design need to be created to challenge the player
- How to show your win / lose conditions
The Implementation phase begins once the program requirements and design are clearly understood and documented. It’s at this point where you can begin to write the code to meet those requirements. The design document provides guidance on exactly how to create the game, so you should reference what you wrote.
Most of the projects we programmed in class started at the implementation phase because the requirements and design were already determined by me ahead of time. I took time in my lessons to go through the planning and design phases.
5 Minute Scrum Meetings / Update Trello Boards
Remember a good meeting is quick and on target. What am I working on today, What help do I need. Those are the questions you should be responding to in your group or individually.
11:55 – 12:30 Lunch

12:30 – 12:55 Independent Reading

12:55 Game Studio Work Time
1:20 Break

1:30 20% Passion Project time or Game Studio Work Time

2:40 Dailies

Dailies can be placed in the CAWD2 Dailies Folder on the CAWD2 Public Folders drive