Class hours: 10:05 – 2:45
Mr. Bohmann | wbohmann@ewsd.org
10:05 Today’s Notes & Attendance
Welcome to Week 22, CTE Red Day and Three Weeks to Vacation!
Winter Break is Feb. 24- March 5th
Visitors – we have some coming to us on Thursday. They are EHS HS students that will be seeing our program in lieu of Advisory.
T-Pose Model – please have a working version by Tuesday of this week. We’ll go back to it often for some lessons.
10:10 Monday Mail
10:12 Custom Character – First Assignment of the Week
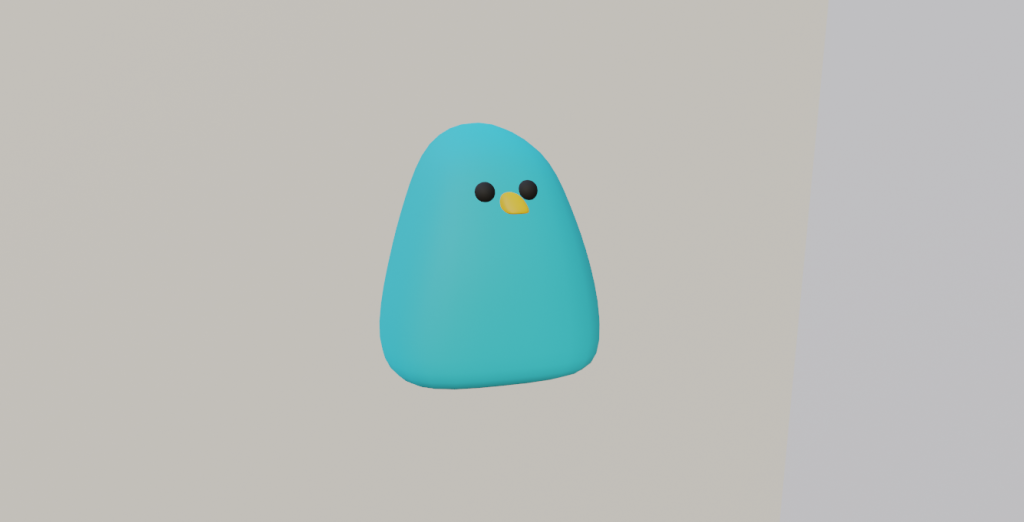
Create your own Custom Character (from block modeling) – and then use the rigging principles we’ve been practicing and add a rig. Depending on your geometry there may be a chance your character will require weight painting after rigging. This might be challenging or easy. You may need to add more geometry to your mesh too.
Your character will need arms and legs and a head. Keep this in mind.
The primary goal is to have a rigged character using IK controls. Secondary is the perfect colors (for right now anyway). The character is due in 1 week – Monday, February 12th. We’ll use it then.
For your submission:
- viewport render in pose mode (so I can see all the bones)
- viewport render animation of your character moving through 3 different poses (3 seconds)
Rigging Action / Review
To get the rigging down, you might want to do one more rigging on a good model. Download the model and change the layout to mode to Layout. Remember to name your bones. Practice will improve our rigging skills. You can download it here. Alternatively, if you have a rigged model from last week, open it and create a Full Copy of a new scene. Get rid of any animations, etc…
Do a Save As and name your file: standardTpose.blend.
Color the left and the right side different with the body as the third color. Feel free to use the same colors you see in the image below or something similar in that the left and right are matching colors (respectively). This will make the walk cycle easier.
Blender – 3D Walk and Run Cycle and Pose Control
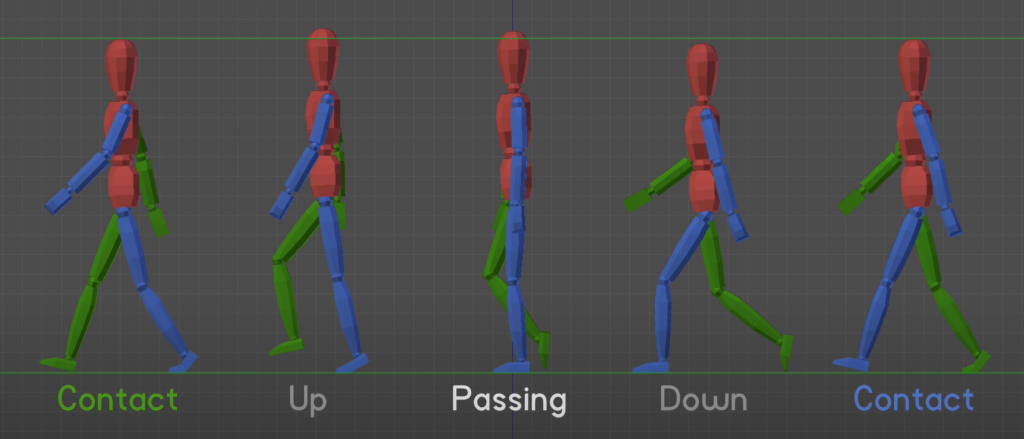
We added some color to our model so we can see the right and left sides of our character. In order for this to work, you need to have completed all of your rigging. Test to make sure everything is in good shape.
A Pose library really speeds up animation. Practice adding some poses in the pose libraries. When creating a new pose, remember to select all of the bones! Use your camera to store a nice looking pose.
We only need to set up 4 Poses for the Walk Cycle to store in our Asset Library.
The Walk will be animated on the 3s!
That means in the image above working from right to left!!!!:
- Contact (blue) on 1
- Down on 4
- Passing on 7
- Up on Ten
- Contact (green) on 13
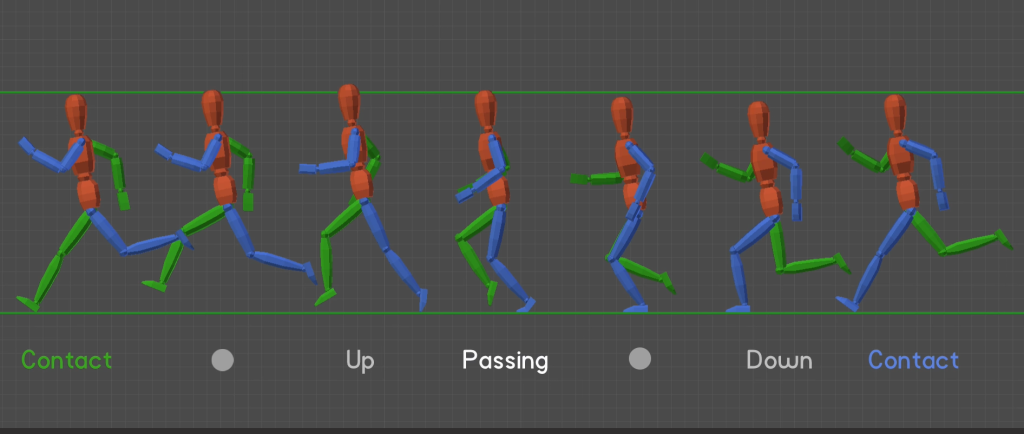
Just like the walk cycle we’ll start and end our animation with the contact pose.
We’ll only need six frames and we’ll animate on the 1’s! Our runner will be fast!
10:50 Break

11:00 English with Mx. Yopp

11:50 3D Animation Project – Mood
Now that we’ve got a walk and run cycle in our Asset Browser, it’s time to add some other actions.
Pick Three
- Mopey & Sad
- Limp
- Sneaky
- Strut
- Waddle
- Prowl
- Other
Set Up lighting, camera and some simple staging. Each pose should animate for 5 seconds.
Render to a final .mp4 for a total of 15 seconds.
Filename: Moods_Demonstration.mp4
Tip, save each as a new scene. Then use the video editor to pull your scenes together.
Due: Monday, February 12th.
12:25 – 12:55 Lunch

12:55 Independent Reading

1:20 Break

1:30 Design Challenge

1:55 Production Time and Guided Support
- Pre-Production – on paper of PSA assets
- Original Character Model
- Moods Project
2:40 Dailies

Dailies can be placed in the CAWD2 Dailies Folder on the CAWD2 Public Folders drive