Class hours: 10:05 – 2:45
Mr. Bohmann | wbohmann@ewsd.org
10:05 Today’s Notes & Attendance
Today is a CTE Red Day –
11:55 to 12:30 – Jerry – you have a Student Leadership Meeting
CTE hosting open house workshops to students in grades 7-11 on Thursday. Do you know anybody that might be a good fit for the tech center programs. We have lots of programs.
Mid point of Q3 is next Friday. Your goal is to be complete – no missing assignments.
VSAC Scholarship applications deadline has moved to March 1st. Phew, right?
FAFSA – the Free Application for Federal Student Aid – workshop from 12 to 1:15 tomorrow. If you want to go, (and you should if you are going to college), bring in your SSN and let me know.
10:10 Animator Assignment: The Jump – Animation Practice
With your custom character and rig that you set up, block out a scene for your character. My character is swiss cheese, so Sammy Swiss is on the Moon.
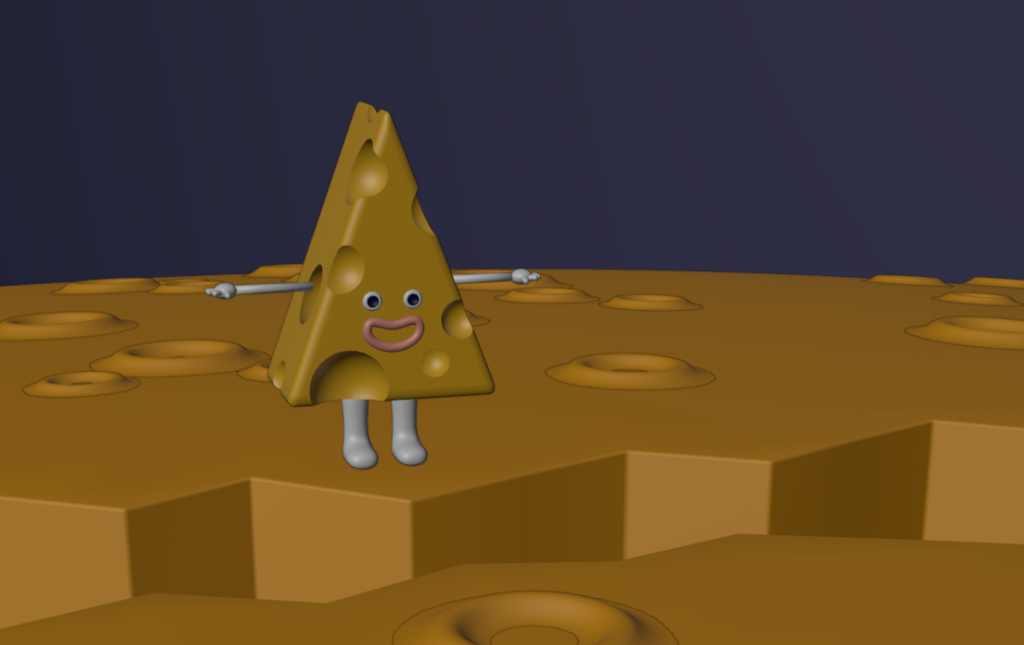
Your task is to “jump” your character. You can set up your mise en scene that befits your character. Don’t forget the value of lighting and cameras. For example, Philip has an Anvil. Maybe the Anvil is jumping from one workbench to another. For this assignment, your character must jump from one space to another. This is a good exercise to showcase weight, overlapping action (drag) squash and stretch and anticipation.
Blocking – is the concept of laying out the main extreme keyframes.
But how do real animators do the work?
Let’s listen at a clip from School of Rock and then watch how a professional animator uses video, the grease pencil in Blender to create an animation reference from an audio clip.
The video references are from a course titled Character Animation in Blender by David Andrade hosted by LinkedIn Learning.
The main take-away is that when setting up your blocking, focus on the silhouette and simplicity of your character. Look at your character through your camera. The frames in between the blocking poses are your breakdowns where you can showcase expression / exaggeration.
Ok, back to our project
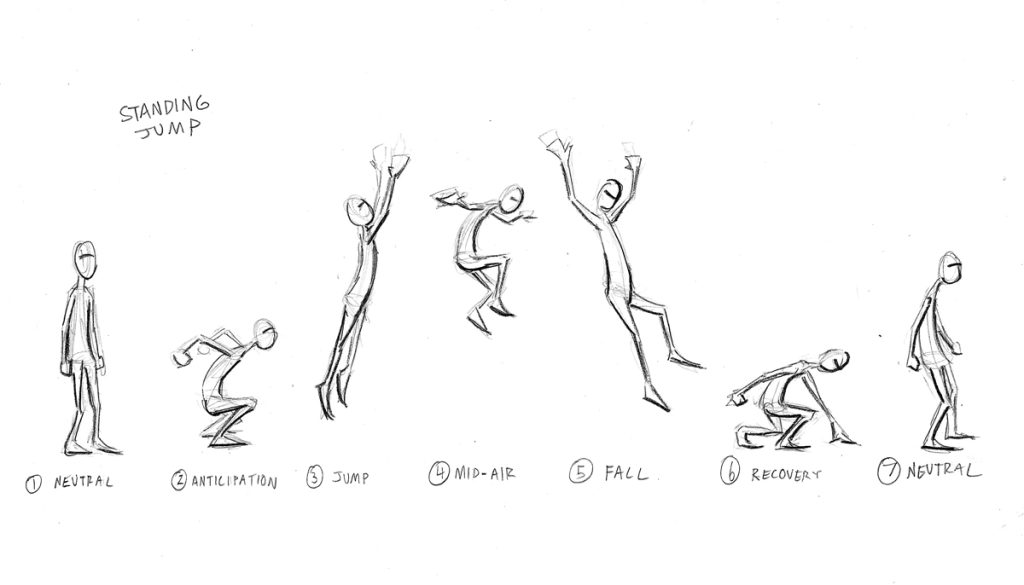
With a jump animation, there are 5 jump poses:
Anticipation, Jump, Mid Air, Fall and Recovery. On either end you will find a neutral pose.
Getting Started – Set the Extreme Poses
- The first step is to block our your main poses. Starting with the neutral pose for you character. I’d suggest you save this pose in your pose library, along with your other poses.
- Create neutral pose on Frame 1.
- Move your timeline to Frame 9/10 and set up the Anticipation pose.
- Set up all the other main poses every ten frames. ProTip, it’s a good idea to adjust your timing between poses after you have everything laid out. More time is generally given to anticipation and recovery poses while the jump and fall animations may be faster.
- You then can go back and adjust the in betweens/breakdowns
Squash & Stretch, Anticipation, Overlapping Action (drag) all make for more fun and enjoyable animations to watch.
Think about your render settings, camera angles carefully.
The details/deliverables:
- Your custom rigged character
- Jump animation has the 5 main key poses with neutral pose at start and finish.
- Jump animation moves the character forward and has anticipation and follow through. Squash and stretch gives a sense of weight to the character.
- Minimum of 5 seconds. Set up the scene (Exposition/stasis) before the big action
- Filename: Jump_lastname.mp4
- ProTip: have fun with lighting, add some sound (not required), add materials, use multiple cameras.
- We’ll showcase our work on Monday, February 19th right after English. Have your renders done by then!
10:50 Break

11:00 English w/ Mx. Yopp
11:50 The Grease Pencil – Working in 2D – Blender
What is 2D animation?
Well, you probably know and definitely have seen 2D animation. A more formal definition is that 2D animation is the art of creating movement in a two-dimensional space. This includes characters, creatures, FX and backgrounds. The illusion of movement happens when individual drawings are sequenced together – like we did thaumatrope.
Over the next week we’re going to explore the 2D interface in Blender, get familiar with the grease pencil in both 3D and 2D workspaces, do some inking and some general doodling while at the same time exploring the 12 principles of animation.
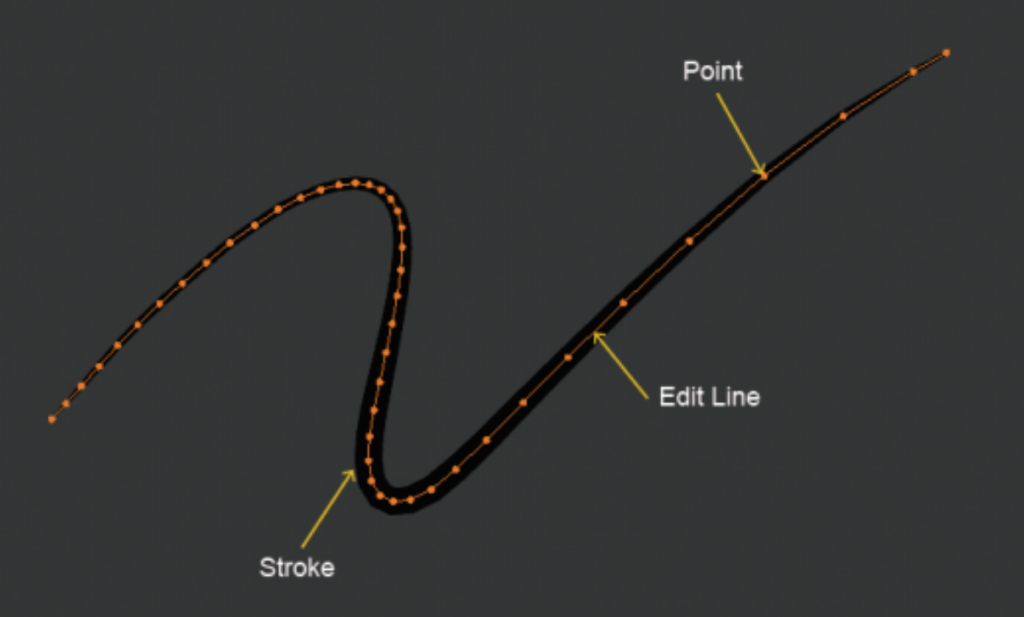
Some key things to keep in mind with the grease pencil are in the editing tab – points, edit lines and strokes.
Like Photoshop, layers is an important part of using the grease pencil and the 2D workspace. We’ll explore:
- Two dimensional drawing in a three dimensional workspace practice Helper tools – drawing plane, layers, materials
- Sculpting the grease pencil
- drawing in edit mode
- types of erasers
- Scissors and editing strokes
- vertex painting vs. material painting
Points
The main element used in editing Grease Pencil objects are points. Points represent a single point in 3D space.
Each point stores all the properties that dene the nal appearance of the strokes as its location, thickness, alpha, weight and UV rotation for textures.
Edit Lines
Points are always connected by a straight line, which you see when you are editing in Edit Mode or when you look at a stroke in wireframe view. They are invisible on the rendered image and are used to construct the nal stroke.
Strokes
The stroke is the rendered image of the points and edit lines
Other terms and functions we’ll explore:
layers, onion skinning, modiers, visual effects, materials and animation
The Blender Grease Pencil workspace works around the concept of Layers and Materials.
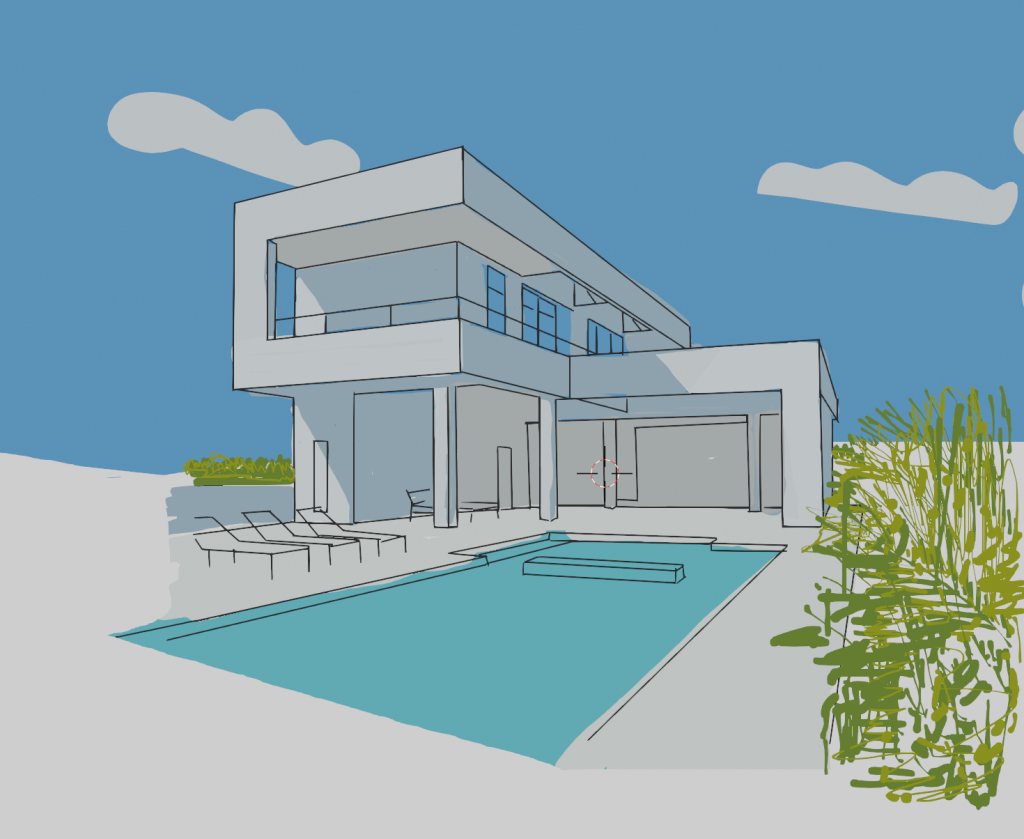
If you want to practice work in orthographic view (#1 on the keypad) and bring in a reference drawing. Here is a link to a sample modern house that I used to create the image at the top of the dayplan.
The goal is to create multiple materials and layers so you could do architectural sketch much like we’d share with a client (if we were architects or designers).
12:25 – 12:55 Lunch

12:55 Independent Reading
1:20 Break

1:30 Design Challenge
1:55 Production Time and Guided Support
2:40 Dailies

Dailies can be placed in the CAWD2 Dailies Folder on the CAWD2 Public Folders drive