Class hours: 10:05 – 2:45
Mr. Bohmann | wbohmann@ewsd.org
10:05 Today’s Notes & Attendance
Today is a CTE Red Day -afternoon classes begin at 1:25pm
CCV Classes on Friday – Order your Lunch today for Friday
September 14th: CTE Back to School Night: 6:00 – 7:30pm This will provide families and students an opportunity to meet with teachers and tour their programs and classrooms. EHS will also be holding their Open House that evening. Come say hi!
Sept. 19th: College Fair Field Trip for CTE seniors 10:15-11:55am @ St. Mike’s College
Cameras – you can begin to take them home starting tomorrow
10:10 Photography – DSLR – Let’s recap
Let’s review some of the concepts from last week:
- Vocabulary
- Aperture Priority
- Shutter Priority
Photography Formats
JPEG
When you shoot JPEG, a raw converter in the camera itself completes all the mathematical tasks to capture a certain color—then the raw converter compresses it . JPEGs apply heavy compression to color data, which can lead to problems with weird skin tone and such when editing time comes. It’s important to keep in mind that when shooting in JPEG, there’s very little you can do after the fact to interpret the color balance of your images.
RAW
When you shoot your pictures in RAW, those files provide the highest quality files. Here, everything is manual except ISO speed, shutter speed, and the aperture setting, which you may remember as the three main pillars of exposure. That means you, as the photographer, are in charge of tonal response, white balance, and colorimetric rendering, thereby giving yourself a great deal of creative freedom.
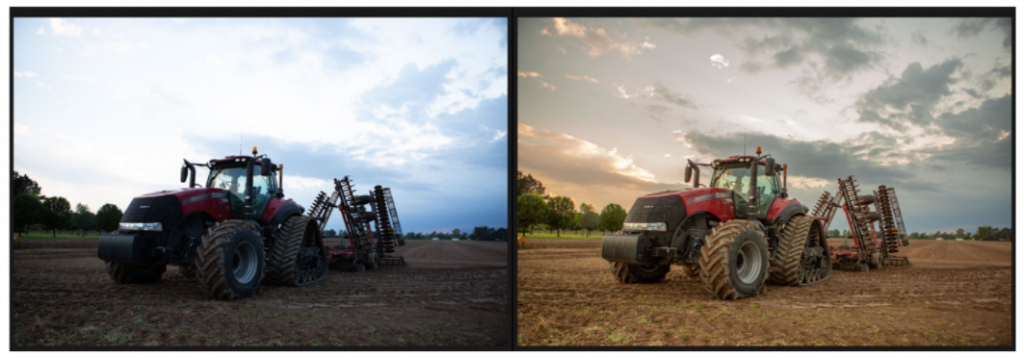
Let’s look at a raw file and do some touch up in Camera Raw. The image can be found in Public Folders
Called: Bryce_Storm.dng
Make a copy and place the copy on your desktop for now.
Open Bridge and then right click on the image to open in Camera Raw
The photo we are using is from: https://www.phototraces.com/free-raw-photos-for-editing/
When working in Camera Raw, we’ll need to set a baseline to begin our photo editing.
What we are basically going to look for when editing is whether we have blown out (overexposed or clipped) our whites (highlights) or crushed our blacks.
Areas we’ll look at include:
Histogram which displays the image tonality (how pixels are distributed). To the left are the darks and shadows and to the right are the highlights. The middle shows the midtones.
Exposure Slider is one of the first areas to adjust. This allows you to adjust the overall brightness of your image(exposure). Watch the histogram as you make all changes.
Blacks and Whites sliders help you determine the optimal highlights (whites) and the shadows (blacks). A good trick is to use the ALT key to see where the pixels begin to clip. It can be helpful to adjust past the point of pixelation, since it can show you how far you can push your whites (and blacks) without blowing out the image and losing detail.
Highlights and Shadows sliders are used to fine-tune your image. This is a creative choice. Lower the highlights slider to darken the brightest sections or increase to make your brightest areas brighter.
Luminance is all of the colors and the intensity of light from them. It measures how much white or black is present in the color(s)
Shadows will reveal the details in the dark sections of your photo
10:50 Break

11:00 English

11:55 Color Isolation (Selective Color) Photo Editing
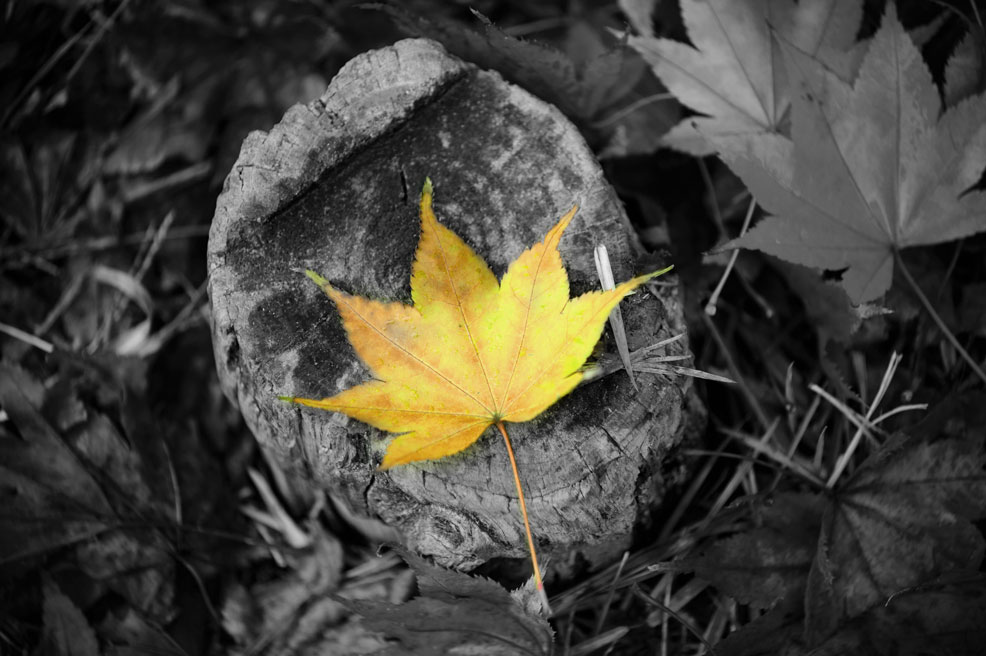
Selective color editing is a powerful technique that allows you to highlight specific colors within an image while converting the rest of the scene to black and white or desaturated tones.
By isolating certain colors and removing we can create visually striking images that draw attention to specific or certain elements. Doing so can communicate a particular mood or feeling.
Selective color editing is commonly used in fashion photography, conceptual art, and storytelling to make subjects stand out, create emphasis, or establish a visual narrative.
I’ve written up the process. Make a copy for your reference.
12:25 – 12:55 Lunch

12:55 Independent Reading

1:20 Break

1:30 Design Challenge
1:55 Production Time and Guided Support
You have two assignments assigned:
- 6Pack_LogoJam – Due Monday, September 18th
- 25 Free Photos Slideshow – Due Monday, September 18th
- 20% Production
- Photo Editing Practice
2:40 Dailies

Dailies can be placed in the CAWD2 Dailies Folder on the CAWD2 Public Folders drive