Class Hours: 10:05 – 2:40
Mr. Cronin
Notes
- You have about 4 hours to get any missing work in! When you leave for the day, we stop thinking about Semester 1.
- We are going to have 4 visitors today this afternoon from 1:20 – 1:50. You will get them from say 1:35 to 1:50. Students working with visitors:
- Trevor
- Caleb
- Lion
- Collin
- MJ – first alternate.
- Due to visitors our afternoon will look a little different:
- No Jobs
- No Speed Design
- Very late break
- Isaiah, Adrian, Jacob – you will leave for your afternoon classes so at 1:25 on your own while I work with the visitors.
- Have a great weekend, stay warm, see you all on Monday!
10:05 Attendance and Article
10:10 Study Guide

When complete use the time for:
Submission of missing work FIRST. This really is it.
Production of current work.
Start thinking about Milestone 3 (see below).
10:50 Morning Break (10 minutes)

11:00 English

11:55 Milestone 3 Introduction
This is where we want to go:
This is going to be our 4th project next week. We will likely have 4 projects per week when doing AR/MR/VR.
If having 4 projects is too stressful, I am willing to take away your agency project from your workload.
This first week is proof of concept. A proof of concept is simply demonstrating what is possible, that it can happen.
Milestone 3:
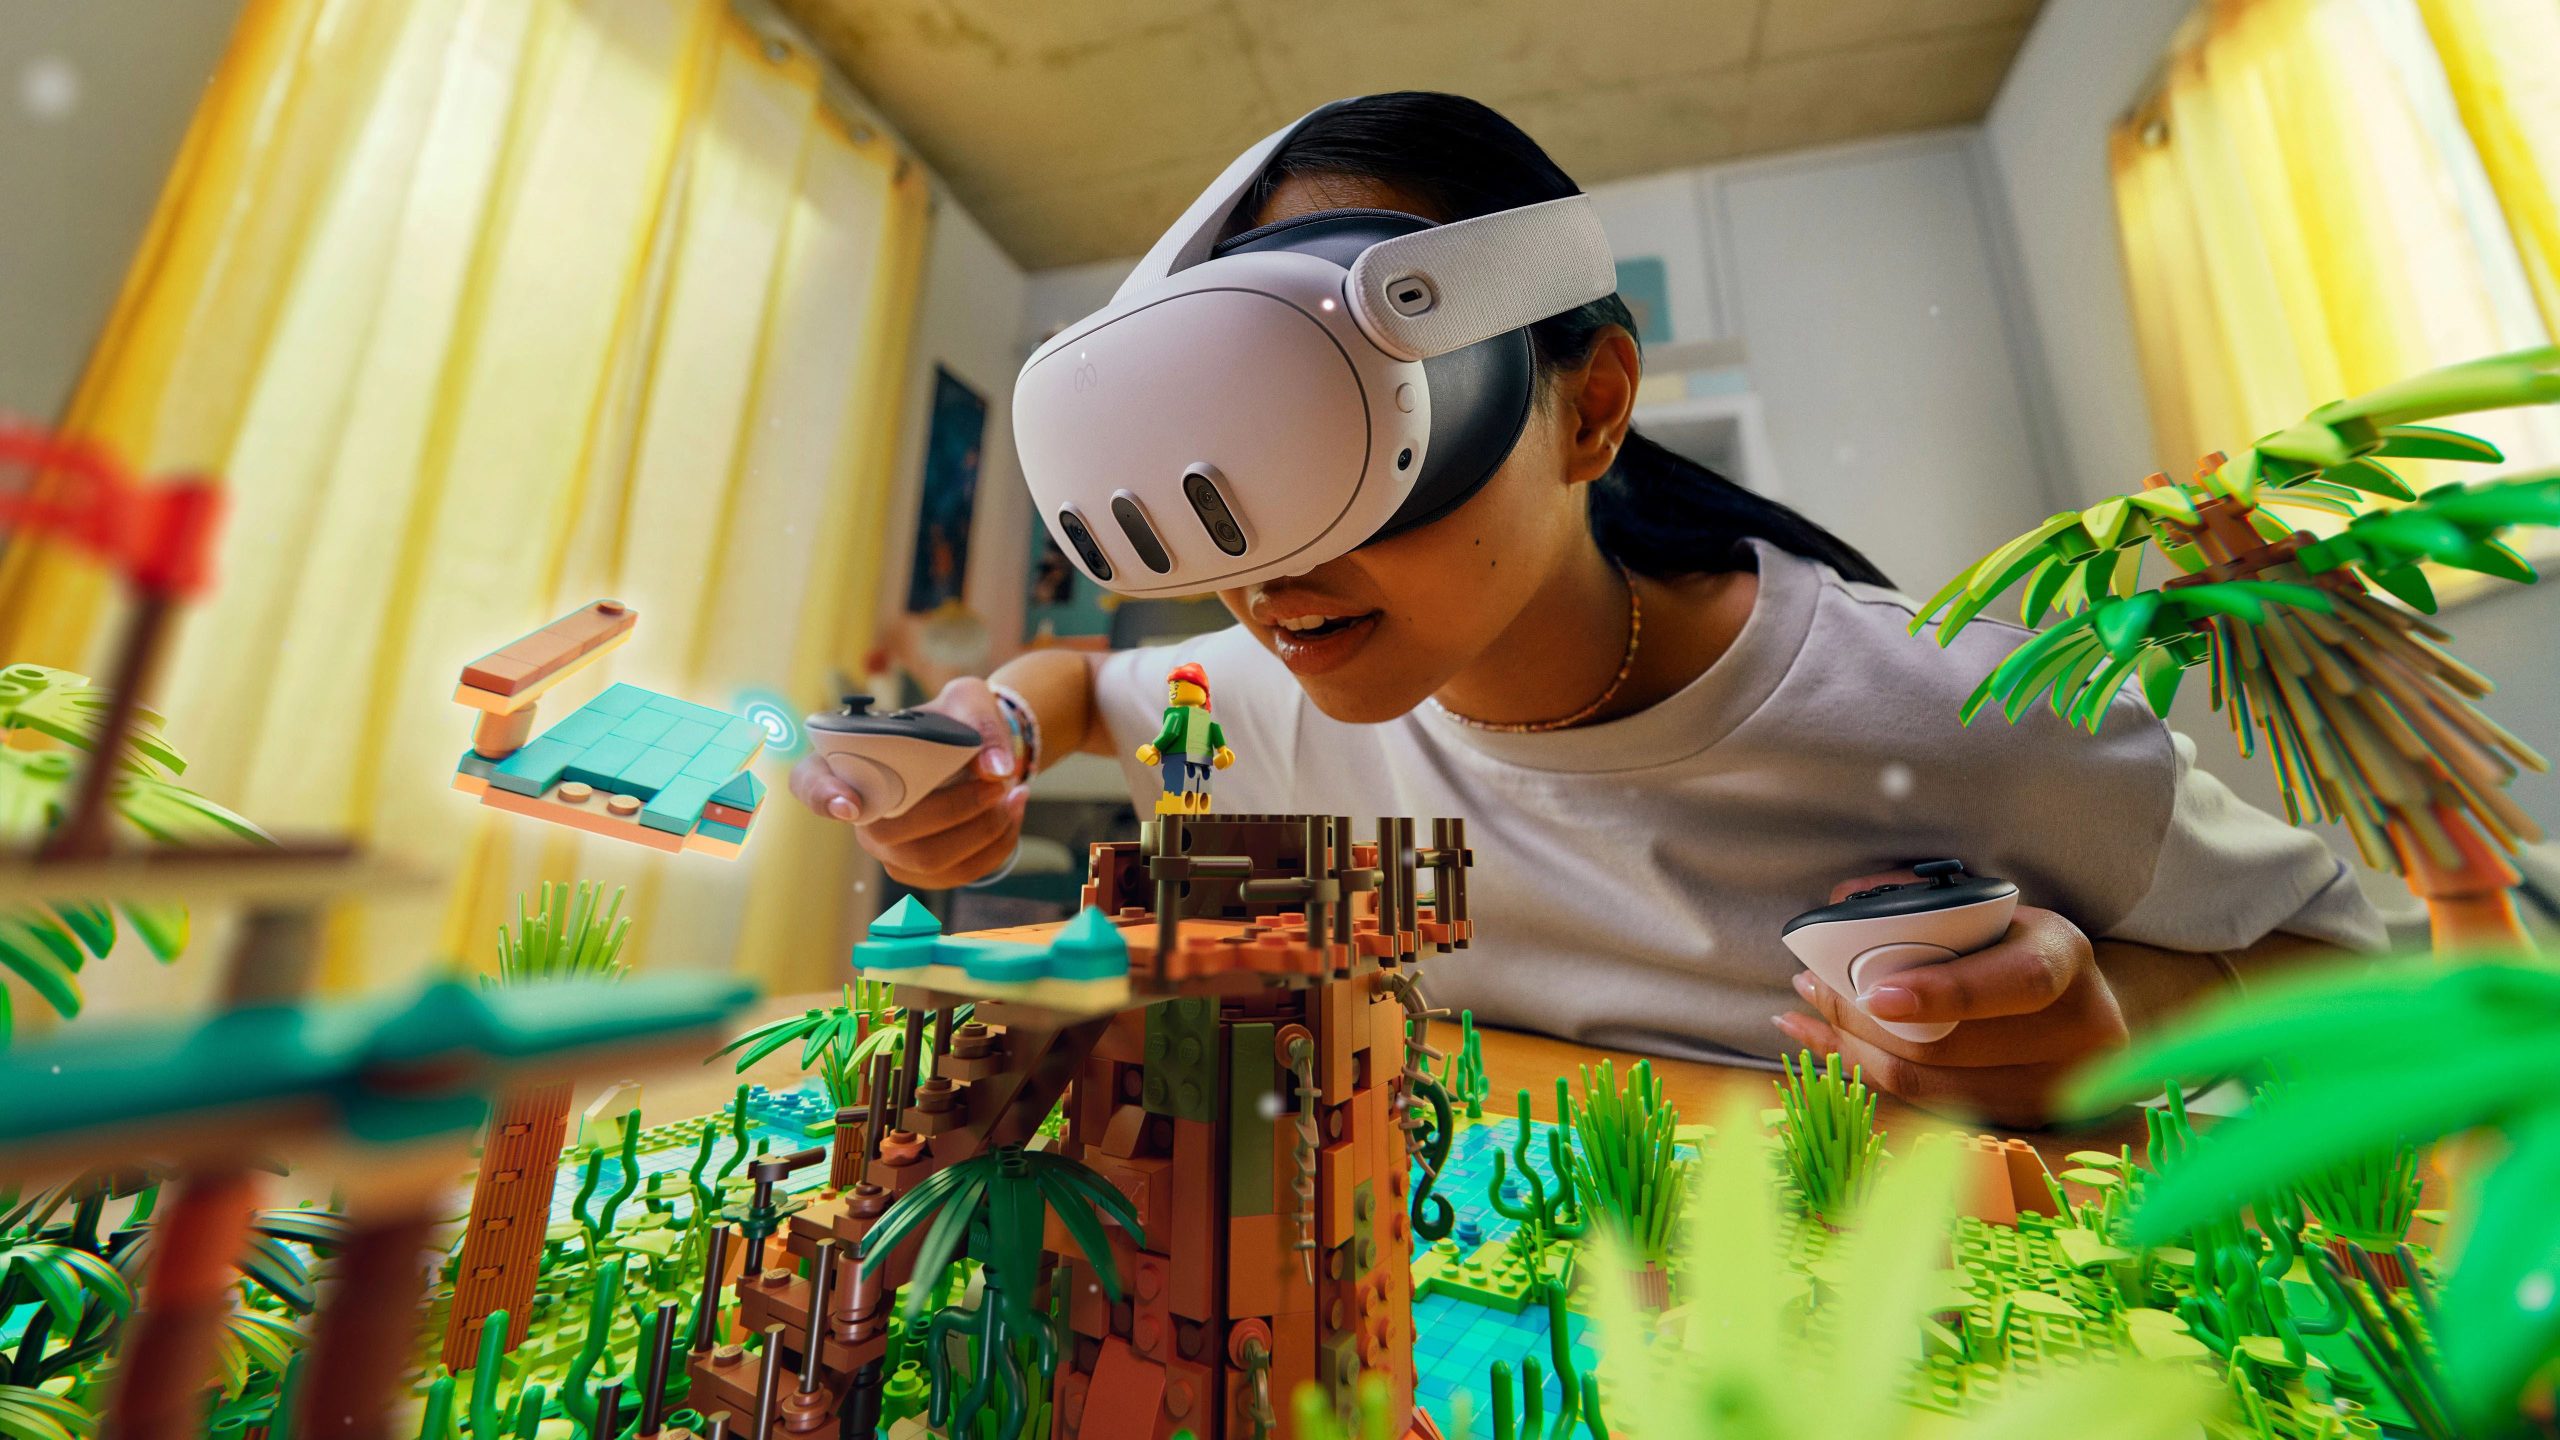
Get a 3D model inside of Unreal Engine, setup with the Quest 3 and the pass through cameras so we can get the effect seen above. A 3D object in “mixed” 3D / Virtual space, where we could move around in 3d space and see the object from different angles.
By next Friday – January 31st – your team needs to demo this working in an MP4. Call your file lastNamelastNamelastNamelastNameMilestone3.mp4.
This will be a 3D model “placed” in the CAWD classroom that we can look at from different angles using the Quest 3!
I asked ChatGPT what the steps were to point us in the right direction, and this is the response it gave me. We can use this as a jumping off point:
To set up your Quest 3 and Unreal Engine for Augmented Reality (AR) or Mixed Reality (MR), you’ll need to follow a series of steps to ensure everything is configured properly. Here’s a breakdown of what you need to do:
1. Hardware and Software Requirements
- Quest 3 Headset: Make sure it’s fully charged and updated to the latest firmware.
- PC Specifications: Ensure your PC meets the hardware requirements for Unreal Engine, especially for AR/MR development.
- Unreal Engine: Download and install the latest version of Unreal Engine from the Epic Games Launcher.
2. Enable Developer Mode on Quest 3
- Oculus App: Install the Oculus app on your mobile device.
- Developer Account: Log in to your Oculus account and create a developer organization if you haven’t already.
- Developer Mode: Enable Developer Mode on your Quest 3 via the Oculus app.
3. Set Up Unreal Engine for AR/MR
- Plugins: Open Unreal Engine and go to “Edit” > “Plugins”. Make sure to enable the following plugins:
- ARKit for Apple devices (if planning to cross-develop), ARCore for Android.
- Oculus VR Plugin: This includes support for Oculus devices and functionalities.
- Restart Unreal Engine to apply the plugin settings.
4. Connect Quest 3 to Your PC
- USB-C Cable: Connect your Quest 3 to your PC using a USB-C cable.
- Allow Permissions: If prompted on your Quest 3, allow access to data.
5. Configure Unreal Engine Project
- New Project: Start a new Unreal Engine project and select a template that suits AR/MR development, like the Handheld AR template.
- Project Settings: Adjust your project settings for AR/MR under “Project Settings”:
- Set the appropriate target platform (Android/iOS).
- Configure graphics settings suitable for AR/MR performance.
6. Develop Your AR/MR Experience
- Blueprints or C++: Use Unreal Engine’s Blueprints or C++ to develop your AR/MR experience. You can utilize the AR/MR toolkit provided by the plugins to integrate virtual objects with the real world.
- Testing and Iteration: Regularly test the AR/MR experience on your Quest 3 by deploying it from Unreal Engine. Make adjustments based on performance and user feedback.
7. Optimize and Build
- Optimize Your Content: AR/MR content can be demanding, so optimize your assets and gameplay to ensure smooth performance.
- Build and Deploy: Build your final project and deploy it to your Quest 3 for final testing.
8. Debugging and Profiling
- Unreal Profiler: Use Unreal Engine’s profiling tools to analyze and improve the performance of your AR/MR application.
- Log Output: Monitor the log output for any runtime errors or performance issues that need to be addressed.
By following these steps, you’ll be able to set up and start developing AR/MR experiences using your Quest 3 and Unreal Engine. Make sure to keep both the software and firmware updated to take advantage of the latest features and improvements.
12:25 Lunch

- No food in the room / eat in the Cafe.
- You are welcome to return to the room when you have finished eating and work / hang out.
12:55 Attendance and Article
1:00 Afternoon Practice & Production

Online Resume
- Folder called “resume”, file called “lastNameOnlineResume.html”
DH19: Baseline Still Life
- lastNameDH_19.jpg
Week 19 Agency
- lastNameAgency_1.jpg through lastNameAgency_3.jpg
Last chance for Semester 1 missing work
Milestone 3?
1:50 Break – 10 Minutes

1:00 Afternoon Practice & Production
2:15 Dailies
2:20 “19 Minutes”

4 of 5 days per week we will end our day in CAWD with the “19 Minutes” of silent reading. Closing down our day with silent reading provides many benefits:
- Improve Literacy Skills / Reading Stamina
- Create space for a small reading meditation where we can disconnect from the world and get lost in a story
- Unplug
At 2:39 each day I will come to 3 students and ask for a 1 sentence explanation of what happened in your story over that day’s reading session. It is neat to hear little pockets of a story, here and there.
2:40 Dismissal