Class Hours: 10:05 – 2:40
Mr. Bohmann | wbohmann@ewsd.org
Week Three
10:05 Today’s Notes & Attendance
- Week Three and our first full week of school!
- CCV class is Friday – remember – we meet in lobby of EHS at 9:50, then head to bus – you can leave our art supplies in the classroom during the week if you like
- We are jumping out of a bus today then heading to break
- Agency showcase this morning at 10:30am
10:10 GAWD Jumps off a bus

Yes, we are actually doing this and then we’ll head back to the classroom
10:20 Monday Mail Check (& PowerSchool)
10:35 Agency Showcase

Each Monday morning you will show us your agency work from the previous week. During your share out tell us:
- What you did
- What tools you used
- What you learned
- What / Why you chose this as your agency
- What’s next…
10:50 Morning Break (10 minutes)

11:00 Photography – The Exposure Triangle
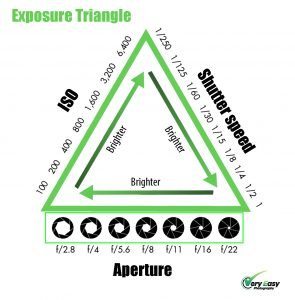
The three main pillars of exposure are Aperture, Shutter Speed and ISO. We just started talking about the first one, Aperture. There is also Shutter speed. These are physical mechanisms that allow you to control the light.
ISO measures the light gathering speed of film. Back in the old days old timey images were exposed for a long period of time using long shutter speeds. With digital cameras the sensor is …well… more sensitive so we can shoot at faster shutter speeds and increase light through ISO.
That means that when you take a picture there are three things that determine how light or how dark your image will be.
- Aperture – (how large or how narrow the aperture is will impact how much light passes through the lens (effect – blurred backgrounds and depth of field)
- Shutter Speed – (how fast or slow the shutter opens and closes – good for stopping or blurring action)
- ISO – the amount of light allowed to hit your camera’s sensor
These three things together are referred to as the Exposure Triangle
11:25 Shutter Priority (Tv)
Link to Photography Terms & Concepts
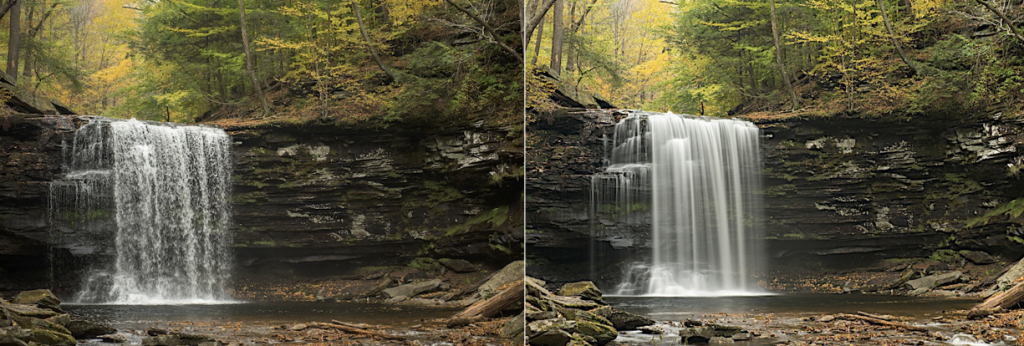
Shutter Priority mode allows you as the photographer to take charge of the speed of the shutter. To review, when you press the button to take a picture, the photo become exposed and the shutter closes when the exposure is complete.
The photo above is a classic example of motion blur using Shutter Priority mode.
The slower the shutter speed the more light is received by the image sensor.
The faster the shutter speed, the less light hits the sensor.
Let’s brainstorm some reasons why we would want to try shooting in Shutter Priority…

A really good way to get an understanding of focal length, depth of field and f/stops is to set up a model in Blender and play with all the the camera settings to see how things work.
While we are at it, we can also play with shutter speed!
Blender’s camera is not like our real camera. The Blender camera is a simulation. That means that Shutter speed is not part of the actual camera in Blender. Rather, shutter speed is part of Motion Blur which is found in the render settings. Let’s continue with our model…
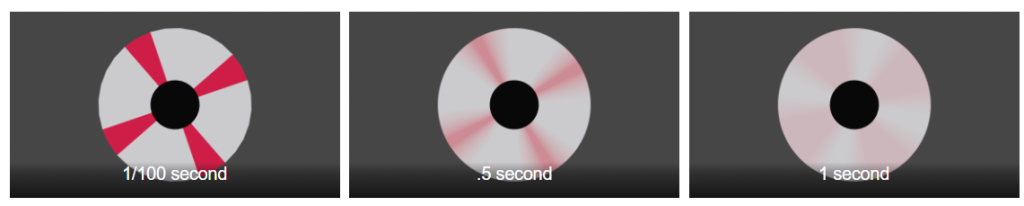
Some settings in Motion Blur to consider (in Blender):
Position:
- Center middle frames of animation
- Start frames of animation
- End frames of animation
Shutter:
- .01 is one hundredth of a second
- .5 is a half second
- 1 is one second
11:55 Lunch
12:25 Sweatshirt – Scrum Meeting
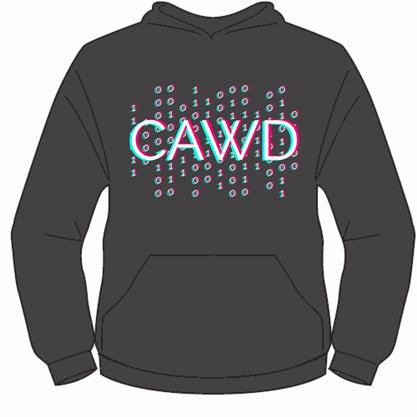
Let’s talk about what’s next with out sweatshirts and the design process – as we have some designs narrowed down
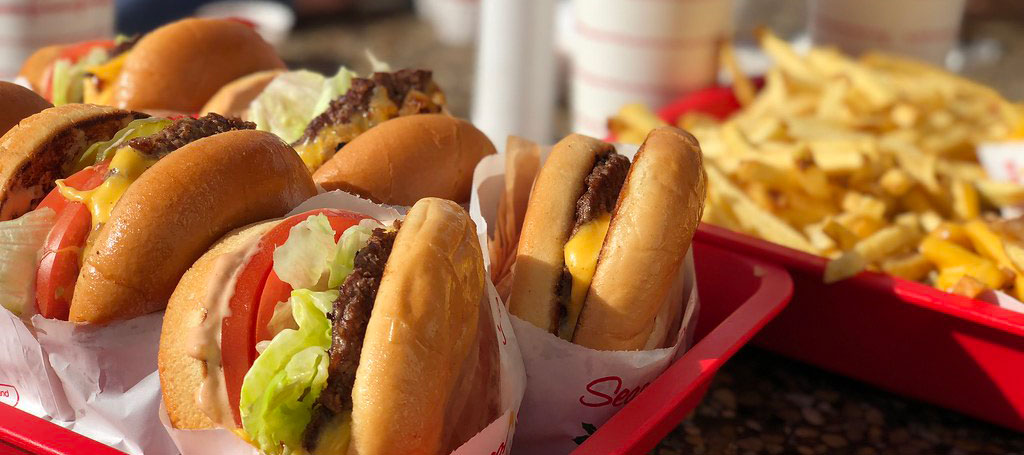
Shooting a Feature
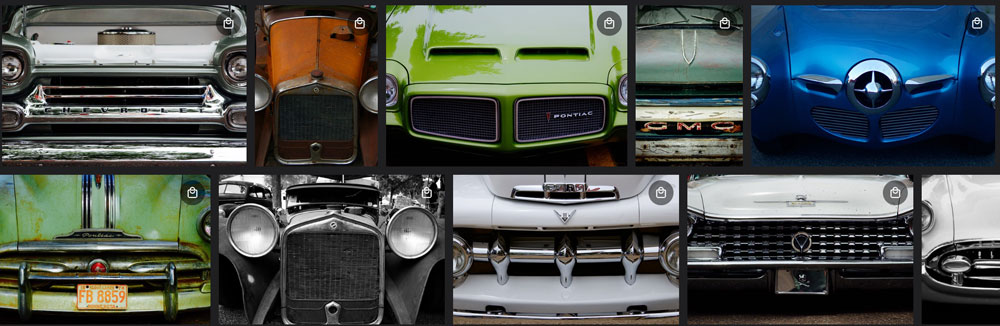
Take a look at the image above. This is my brother-in-law. He’s got a good eye for photography. He’s taken thousands of pictures of cars, motorcycles, rat bikes, places and things. He likes to fill his viewfinder with the full subject – called full frame photography. In editing he works with the color tones, shadows and highlights to improve is photos. Most often he uses a prime lens – which is a set focal distance lens. His lens of choice is 50mm – so he just walks closer if he wants to zoom.
This morning if the weather is agreeable– let’s head out to the parking lot. Find a subject (item) on a car and create some full frame photography. Shoot many of the same subject – at least twelve but take a whole lot more! Let’s use our prime lens – which is the 50mm.
This week’s Photography assignment:
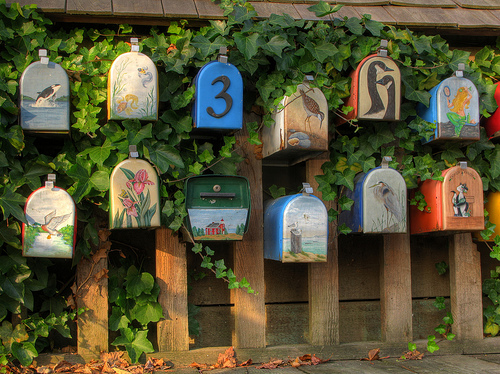
- Take your camera out into the world. Find an item to feature – much like you see in our demo today (bike, mailboxes, house numbers, collectibles. We should be able to tell what that feature is in ech picture and all pictures should be related.
- Preview your photos and edit each one for good color, contrast, etc….
- Resize each of your photos so you can fit them in a grid
- You can resize using an excellent tool in Bridge – I can demonstrate
- Then Assemble your photos in a grid on a 1920 by 1080px canvas.
- Export for Screens
- Filename: Shooting_a_Feature_lastname.jpg
- This project is due on Tuesday, September 22nd
1:10 Afternoon Break
1:25 Speed Design

1:45 Independent Production & Guided Support
- Personal Logo Sketches – 5Pack due Thursday, September 17th
- Shooting a Feature – due September 22nd (Filename: Shooting_a_Feature_lastname.jpg)
- Agency Week Three – due September 22nd (filename: week3Agency_lastname)
2:10 Dailies

2:15 Independent Reading

2:40 Dismissal