Class Hours: 10:05 – 2:40
Mr. Bohmann | wbohmann@ewsd.org
10:05 Today’s Notes & Attendance
- Four Day Weekend ahead
- Fire Drill at 1:25pm today
- Cameras – taking them home…
- You may take your cameras home. The camera is a valuable piece of equipment. It is your responsibility to care for your camera. Do not leave it in your car, on the bus or away from your immediate possession. Practice securing and breaking down your camera after you use it.
- This is the current replacement cost. That is a lot of cash. You don’t have to take your camera home with you, but you have the option. Vermont is beautiful and so are the areas you live. A lot of variety and practice happens from shooting “out in the field”.
- You must be prepared to have your camera and SD card with you each day. We will continue to use your camera in class. Don’t forget it.
10:10 How a DSLR Camera Works
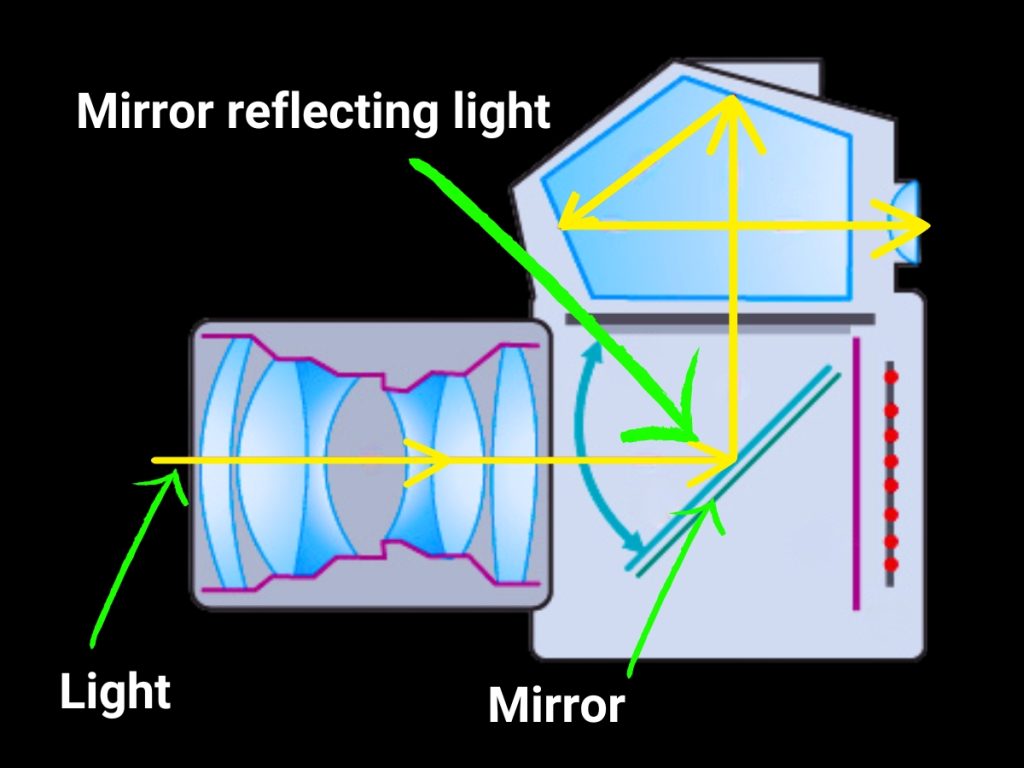
Let’s look at some basic camera controls and learn a little more about your DSLR camera.
A DSLR camera, which stands for Digital Single-Lens Reflex, is a type of digital camera that uses a mirror and prism system to provide an optical viewfinder, allowing the photographer to see exactly what the lens sees before taking a photo. Key features include interchangeable lenses for versatility, a digital sensor for capturing images, and excellent image quality due to the larger sensor size compared to simpler cameras.
Abstract Photography
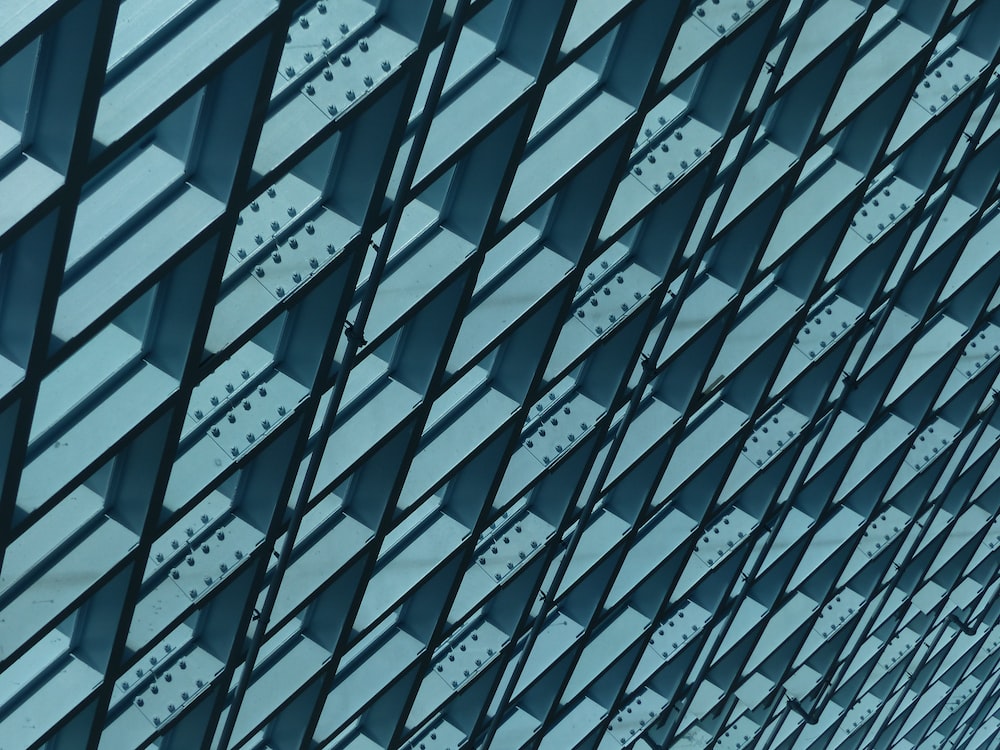
Photography has the power to isolate a fragment of a composition and turn it into art and to freeze shapes and images to take on new meaning far different from their original intent.
Abstract Definition: existing in though or as an idea but not having a physical or concrete existence
The goal of today’s lesson is to build confidence and familiarity with your new camera, while also practicing framing shots that isolate an element or color to create an interesting abstract. Wow!, that’s three vocabulary words right there!
The other goal of today’s lesson is to shoot images that are in focus (always a goal)!
The easiest approach to abstract photography is the close up shot. Close-ups remove the context of what is in the viewfinder as well as emphasizes the texture and graphic elements.
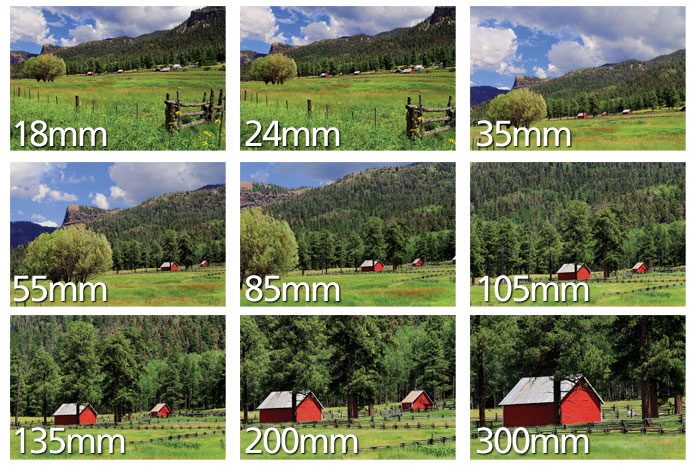
You can create a close up shot by changing the Zoom (changing the field of view) or walking closer to your subject. In some ways Zoom and Focal Length are similar.
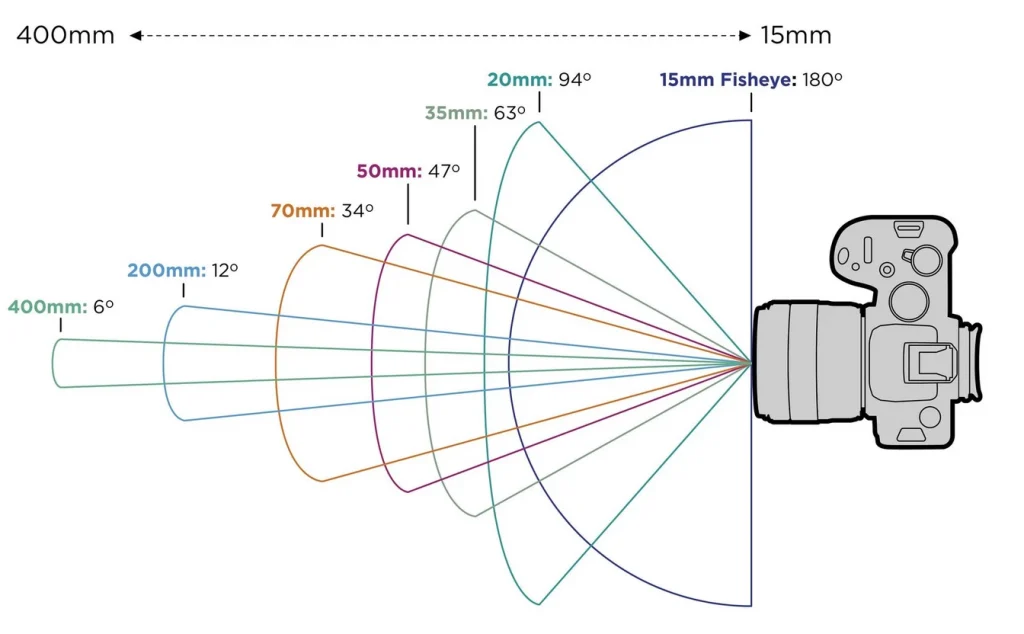
So, Focal Length is important to know. Focal length determines the lens field of view.
Focal Length is the space from the camera sensor to the lens. This measurement is measured in millimeters.
- Wide Lens – 35mm
- Normal Lens – 50mm
- Telephoto Lens – 75-300mm
Using the zoom feature on your camera will adjust the focal length on some lenses.
Activity, we’ll head out as a group to the front courtyard. Find and shoot at least 12 subjects that will serve as your abstracts. Look at different angles. To get 12 good shots you might need to take 60.
Don’t worry, you won’t run out of film!
Shoot in Automatic mode and use Manual Focus
Try to get in focus shots!
When we get back to the classroom, select your favorite shot (edit if you need to) and put up on your screen. We’ll look at after the break today.
10:50 Morning Break (10 minutes)

11:00 Photography & File Formats
JPEG
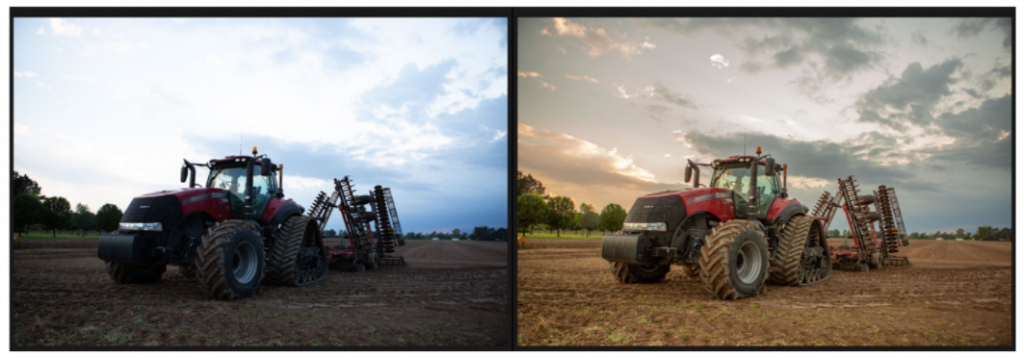
When you shoot JPEG, a raw converter in the camera itself completes all the mathematical tasks to capture a certain color—then the raw converter compresses it . JPEGs apply heavy compression to color data, which can lead to problems with weird skin tone and such when editing time comes. It’s important to keep in mind that when shooting in JPEG, there’s very little you can do after the fact to interpret the color balance of your images.
RAW
When you shoot your pictures in RAW, those files provide the highest quality files. Here, everything is manual except ISO speed, shutter speed, and the aperture setting, which you may remember as the three main pillars of exposure. That means you, as the photographer, are in charge of tonal response, white balance, and colorimetric rendering, thereby giving yourself a great deal of creative freedom.
Let’s look at a raw file and do some touch up in Camera Raw. The image can be found in Public Folders
Called: Bryce_Storm.dng and Cathedral Valley Road and San Francisco Haze
Make a copy and place the copies on your desktop for now.
Open Bridge and then right click on the image to open in Camera Raw
The photo we are using is from: https://www.phototraces.com/free-raw-photos-for-editing/
When working in Camera Raw, we’ll need to set a baseline to begin our photo editing.
What we are basically going to look for when editing is whether we have blown out (overexposed or clipped) our whites (highlights) or crushed our blacks.
Areas we’ll look at include:
Histogram which displays the image tonality (how pixels are distributed). To the left are the darks and shadows and to the right are the highlights. The middle shows the midtones.
Exposure Slider is one of the first areas to adjust. This allows you to adjust the overall brightness of your image(exposure). Watch the histogram as you make all changes.
Blacks and Whites sliders help you determine the optimal highlights (whites) and the shadows (blacks). A good trick is to use the ALT key to see where the pixels begin to clip. It can be helpful to adjust past the point of pixelation, since it can show you how far you can push your whites (and blacks) without blowing out the image and losing detail.
Highlights and Shadows sliders are used to fine-tune your image. This is a creative choice. Lower the highlights slider to darken the brightest sections or increase to make your brightest areas brighter.
Luminance is all of the colors and the intensity of light from them. It measures how much white or black is present in the color(s)
Shadows will reveal the details in the dark sections of your photo
Strategies for Retouching photos
The amount you do depends on the image you are working with and your goals for it. Most retouching of photos includes these general steps:
- Duplicating the original so as to have a copy on hand
- Checking your image resolution for the ways you’ll use the image
- Cropping to final size and orientation
- Repairing flaws of damaged photos (rips, dust, stains, etc…)
- Adjusting the contrast or tonal range
- Adjusting color and tone to bring out highlights, midtones, shadows and desaturated colors
- Sharpening of the image
- Exporting and saving
11:55 Lunch
12:25 English with Mx. Yopp

1:10 Afternoon Break
1:25 Fire Drill
1:45 Speed Design
2:00 Independent Production & Guided Support / Voting of Sweatshirt Paper Designs

- 25 Free Photos Due Tuesday
- Low Poly Art with Illustrator due Wednesday
- Paper Designs – Sweatshirt 3 Pack due now and ready for voting
2:12 Dailies
2:15 Independent Reading
2:40 Dismissal