Class Hours: 10:05 – 2:40
Mr. Bohmann | wbohmann@ewsd.org
10:05 Today’s Notes & Attendance
- Tuesday – Week 24
- Animatics for VHSA – We’ll look at 12:05 on Wednesday (tomorrow)
10:10 Vermont Highway Safety Alliance – Workshop/Session

Actual Animatic vs. Actual Film Opening
Animatic – a preliminary version of a movie, produced by shooting successive sections of a storyboard and adding a soundtrack and/or sound effects
10:50 Morning Break (10 minutes)

11:00 Unity Programming Continued….
The concept of “game physics” usually includes all movements and collisions than an object might have in a game. Think about a simple cannonball shot from the deck of a pirate ship. How should an object like that behave?
- It should have force as it comes out of the cannon, giving it direction and speed
- It should fly out and fall out of the air due to gravity
- If the cannonball hits another object, the cannonball has some kind of collision based on the mass and what it collides with. Check out what I mean
Before quality game engines, this used to have to be carefully programmed to look real.
In Unity, there is a build in Physics engine just for this.
Open your 2D project (called) 2D_Playground Project. Create a new 2D Scene
-name it PhysicsPractice
I have some new Sprites for you , grab what you like from my Google Drive Folder
Rigidbody and Rigidbody2D
In Unity, the physics engine is handled by a component that you attach to a game object.
For a 2D game, component is called Rigidbody2D. When you attach this component to a game object like a sprite, that object automatically comes under the control of the Unity 2D Physics engine. Objects with a Rigidbody2D component can respond realistically to physical forces such as gravity.
Rigidbody 2D Properties can be modified to make your gameObject behave more like you intend it to. For example a tennis ball is bouncy and a cannonball is not (so much).
Some Properties include:
- Mass – lets you control how much mass an object contains. The higher the mass, the harder an object is to move and the more effect it has when it collides with other objects in the game. Mass does not change how fast an object will fall.
- Gravity – controls how strongly gravity will affect your game object. Increase gravity to increase the speed that something falls (or does not – use negative numbers)
- Linear Drag – an object thrown in the air will naturally slow down due to air resistance. A beach ball has more linear drag than a rock.
- Angular Drag – Some objects spin (rotate) very easily, without much resistance like the wheel on your bike. Higher drag values will slow an objects spinning motion.
- Body Type (dynamic, kinematic or static) more on this later….
Bounce and Friction are Material Properties
In Unity we can create our own physics materials to control the behavior of our gameObjects.
The Friction value controls how much resistance is felt when an object is moving in contact with this material. A value of 0 means there is no friction or resistance at all.
The Bounciness value shows how much one object will bounce when it collides. A value of 0 means the object will not bounce at all and a value of 1 means that it will bounce equally back to the starting point. A value of 2 means it will bounce twice as high as it started (each time). A value of .8 will bounce 80% of the first bounce and so on….
Challenge: Bowling Game
Don’t worry, we won’t use any code! (well, maybe a little bit…)
- Create a new scene. Name it Bowling Game
- Set up your bowling ball sprite at to the left of the screen and your pins at the bottom right of the screen (As many Pins as you like)
- Add Rigidbody 2D for your ball and pins – don’t forget the colliders
- Add physics material for pins/ball as you see fit
- Can you also adjust the bowling ball’s Mass, Angular Drag, Linear Drag, and Gravity Scale to produce different behavior?
- Observe and try to understand how different Rigidbody 2D properties affect your game
- What About PreFabs? That might make your work easier.
Sample Code for a ball launcher
using UnityEngine;

public class BowlingBall_Launch : MonoBehaviour
{
    // A reference to the Rigidbody2D component that handles the physics
    Rigidbody2D rb;

    // Awake is called when the script instance is being loaded (before Start)
    void Awake()
    {
        // Search for and store the Rigidbody2D attached to this specific GameObject
        rb = GetComponent<Rigidbody2D>();

        // Safety check: Log an error if the Rigidbody2D is missing in the Inspector
        if (rb == null)
        {
            Debug.LogError("Hey! There is no Rigidbody2D attached to " + gameObject.name);
        }
    }

    // A custom function that takes a direction (Vector2) and strength (float)
    void LaunchBall(Vector2 direction, float force)
    {
        // AddForce moves the object.
        // ForceMode2D.Impulse applies the entire force instantly (like a hit or an explosion)
        // rather than pushing it gradually over time.
        rb.AddForce(direction * force, ForceMode2D.Impulse);
    }

    // Start is called on the frame when a script is enabled
    // just before any of the Update methods are called the first time
    private void Start()
    {
        // Call our function:
        // Vector2.right moves it along the X-axis (1, 0)
        // 50f is the strength of the 'flick'
        LaunchBall(Vector2.right, 50f);
    }
}
11:55 Lunch

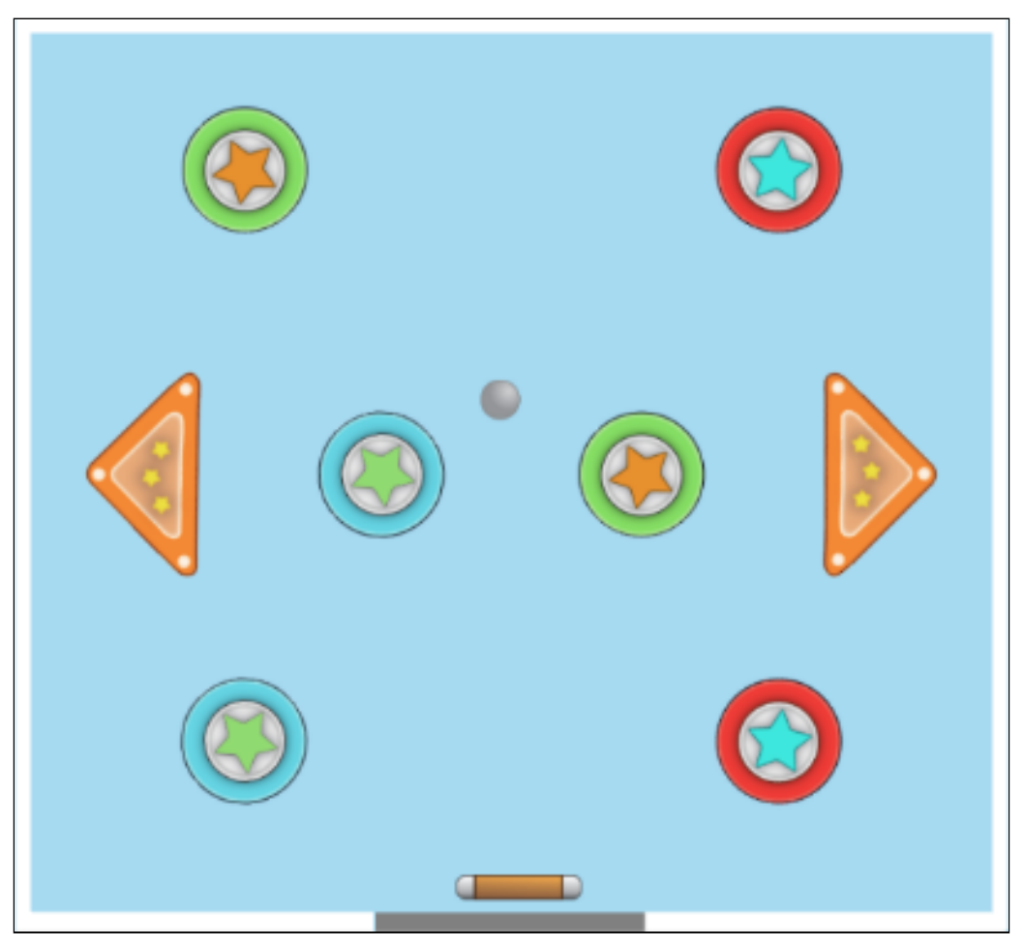
12:25 Pinball – Let’s design a gameboard…
using UnityEngine;
using UnityEngine.InputSystem;

public class PaddleMoverPinball : MonoBehaviour
{
    [SerializeField] private float moveSpeed = 5f;
    [SerializeField] private float xMin = -5.5f;
    [SerializeField] private float xMax = 5f;
    private Vector2 moveInput;

    private void OnPaddleMover(InputValue value)
    {
        moveInput = value.Get<Vector2>();
    }
    private void Update()
    {

        // 1. Calculate the movement for this frame
        Vector3 movement = new Vector3(moveInput.x, 0, 0);

        // 2. Move the transform
        transform.Translate(movement * moveSpeed * Time.deltaTime);

        // 3. LOCK THE POSITION
        // We get the current position, change the X, and shove it back into the transform
        Vector3 currentPos = transform.position;

        // Mathf.Clamp(Value, Min, Max) forces 'currentPos.x' to stay between -5 and 5
        currentPos.x = Mathf.Clamp(currentPos.x, xMin, xMax);

        // Apply the "clamped" position back to the paddle
        transform.position = currentPos;
    }
}
Think of Mathf.Clamp as a safety fence for your numbers. It forces a value to stay within a specific range, no matter how hard you try to push it past the boundaries.
If the value tries to go too high, it gets snapped back to the maximum. If it goes too low, it gets snapped to the minimum.
The Syntax
The function requires three pieces of information (arguments):
Mathf.Clamp (Value, minimum, maximum)
- Value: The number you are currently changing (like your paddle’s X position).
- Min: The lowest the number is allowed to go.
- Max: The highest the number is allowed to go.
1:10 Afternoon Break
1:25 Power Clean – 10 minutes
1:35 Speed Design

1:45 Independent Production & Guided Support
- PSA – Animatic due on Wednesday
- PSA – First Looks due on Friday
2:10 Dailies

2:15 Independent Reading

2:40 Dismissal