Class hours: 10:05 – 2:45
Mr. Bohmann | wbohmann@ewsd.org
10:05 Today’s Notes & Attendance
- Week 25 – Welcome Back! (we’ll call this Week 25 continued…
- Q3 Ends on Friday – then we move on to Q4 – your final quarter
- Work to be graded to count as part of Q3 must be submitted by 2:45pm on Friday
- Pinball theme assets are required by Thursday, March 26th. We’ll need them!
- Friday – Husson University going to share information about their XR Program
- Welcome back Collin!

10:05 2D Animation Project – Lip Sync Battle
The goal of this project is to continue exploring the 2D workspace in Blender, practice working with audio and use your creative skills to push your animations.
What we are working for is a LipSync battle. Our lip sync battles will take place in two weeks.
The due date will be April 8th – A Wednesday.
This entire project will be completed in Blender using the video editor tools.
We are going to create some original characters and then set them in an appropriate setting to perform a 20 second Lip Sync. I’ve got some sample for you to check out. Notice that secondary animation is more fun….
For this project, you are going to need several assets.
- A piece of music in .mp3 form (don’t worry about copyright – we are going all out)
- A character(s) / backgrounds inked out in 2D workspace
- A reference image for common vowel sounds (google mouth shapes) Results
To minimize problems, I am going to advise you to incorporate 1 Grease Pencil object (blank) along with a second Grease Pencil. Yes, that means you’ll have two Grease Pencil Layers.
After you add your blank stroke, move it to it’s own collection. In this collection you will create the mouthshapes.
then on your other stroke layer create:
- background layers for your scene
- layers for your character
- Remember, layers are important – anything you want to animate should be it’s own layer
By the end of this week you should have:
- Your music selected and downloaded as an .mp3 , reliable tool
- Begin building your scene (you can also model in 3D and render as image to get the right perspective, shadows and staging)
- Create your character (or have a good idea of your character) and ink out in it’s own GP Stroke
- Tackle the Mouthshapes as a separate GP Stroke
- ProTip – keep each GP Stroke in its own Collection
- You’ll notice from the examples that the best ones include more than the mouth animation.
I’ll demo adding audio in Blender and using the video sequencer to scrub and sync to mouth shapes. Save often and do check your layers carefully (which layer you are on).
Headphones will make everyone happier!
Let’s get started and work up until Break.
10:50 Break

11:00 Pinball Project
Pinball is a classic stand-up arcade game and one that I played a lot growing up. A steel ball is shot onto a playing surface and bounces between bumpers and other gadgets, scoring points. The player tries to keep the ball in play with flippers or paddles at the bottom. Making a Pinball game is a great chance to show off the physics engine in Unity and some of the skills you worked on over the last two weeks on movement. Open the project we created called 2D Playground (or something like that).
For now we are going to continue just building some concepts. You will be building your very own game using your theme assets (that are due tomorrow).
All of our Game Objects have data attached to them. The Transform of a gameObject has 9 pieces of primitive data – like location of x, rotation of z and scale, etc….
We can store information about game object values to calculate health, score points, among other game play options. Each value can be stored in a uniquely named storage area called a variable.
A variable is defined with a specific data type (such as int or float) and a name such as myScore or player1Health. You can change the variable’s contents while the program is running – that’s why it’s called a “variable”. We used lots of variables to store data.
Public variables are accessible from game play and from other scripts. Private variables, which is the default for variables are available only for that script.
[SerializeField] is a private variable type but is available from game play to adjust while testing
public class MyScript : MonoBehaviour {

   int score;               // declare an int called Score
   float currentDirection;  // declare the float currentDirection
   char myInitial;          // declare a char called myInitial
   string userName;         // declare a string called userName
   bool isMoving;           // declare a bool called isMoving

   void Start () {

      //  numeric data types do not require quotes
      score = 8;

      // use the "F" suffix to specify a float value
      currentDirection = 90.2F;

      // use single quotes around individual characters
      myInitial = 'A';

      // use double quotes around groups of characters
      userName = "Will Bohmann";

      // boolean values are either true or false
      isMoving = true;
   }
}
Variable Scope refers to where you place your variables. If you placed your variable in the Start method, it will run when the game begins and then not be accessible again.
We already know that we use variables to provide more code flexibility. In many cases we may want to store mathematical operations in a variable. Let’s look at some common math operations.

int added = 3 + 4;          // added is 7
int subtracted = 3 - 4;     // subtracted is -1
int multiplied = 3 * 4;     // multiplied is 12
int divided = 12 / 4;       // divided is 3
int remainder = 12 % 5;     // remainder is 2
Pinball Level Up with variables
You can use variables to do important things within your game. For example, many games will need to keep a score. Let’s add a score keeping variable to our prototype pinball game and have the results printed in a Debug.Log statement.
To begin, you will need to declare a variable for score (what type of variable will you use? and where should you put it?). We want the Score to be displayed when the game begins (so we’ll place a Debug.Log statement in the Start() method.
One last decision – which game object should we create the script for?
We’ll also need to make the variable Public so we’ll put it at the top of the script too
void Start ()
{
   // display the current score on start
   Debug.Log ("Score = " + score);
}
//score is a great variable name because it is...semantic!
Inside the OnCollisionEnter2D() function, set the score variable value to 1. Then, again use Debug.Log() to display the current score to the screen.
void OnCollisionEnter2D (Collision2D otherObject)
{
   // set the score to 1
   score = 1;

    // display the new score
   Debug.Log ("Score = " + score);
}

In the example above, the score just stays at 1. Not entirely what we would want.  So, let's look at using some operational shortcuts in our code to how we can calculate the score each time the ball collides with a gameObject that has a collider.
score = score +1 //adds 1 to the variable
score +=1 //same as above, but add what's on the right to the left
score ++  //means add 1 to the score
Instead of using just the Debug.Log function, we could initialize our score variable at the top of our script as a public variable and then as the game plays we can watch the score increase in the inspector.
Let’s Level Up some more: Setting up Score with the UI Canvas – Instruction
Challenge/Deliverables:
- The player’s score should start at 0 when the game begins
- The player’s score should be displayed in the top center of the screen
- Each time the ball collides with (bumpers paddles, walls, the score should increase by 1
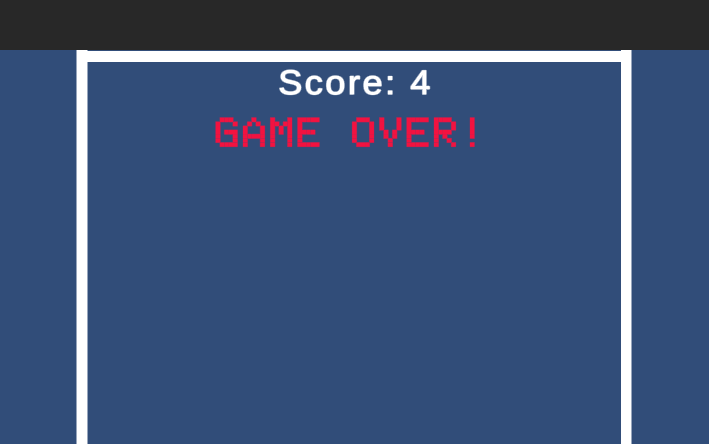
- When the game ends, the phrase “Game Over” should be displayed under the score
The big picture – Here is a basic outline of the steps you need to complete the tasks above:
- Add a Canvas and two Text objects (one for the score, one for the game over message)
- Edit the existing BallScript (or whatever you named your script on the ball) and add a score variable and two public Text variables
- Modify the BallScript functions to update the Score and Text variables as needed
- Link the two Text objects to the two Text variables in the BallScript
Easy, right? We can work on the steps together if you are having trouble.
If you get lost, here is a reference worksheet
11:35 Lunch

12:05 Finishing Up with Score and Variables
- Finishing up with Score and variables
- Pinball Theme – worksession
1:00 Afternoon Break (15 minutes)
1:15 Dailies
1:20 Independent Reading
