Class hours: 10:05 – 2:45
Mr. Bohmann | wbohmann@ewsd.org
10:05 Today’s Notes & Attendance
- Wacky Wednesday
10:10 Unity – Animation Basics
Once you have a set of animation images, creating the actual animation in Unity is very simple! First, you will add your images as individual sprite assets. This is done just like you have always added images to your earlier games. Create a “Sprites” folder inside the “Assets” area and then copy all of your images into that folder.
I have a sample folder of animated sprites for you. You can find it in public folders – called DogSprites.
- Let’s open a new scene in our Game Programming project – call it AnimationPractice.
- Add the DogSprites Folder to your sprites folder.
Let’s start with a walk cycle. Just select all of the animation images for (walk) and drag them onto the scene at the same time. Unity will automatically recognize that you want to create a Unity Animation. In Unity, an Animation is an asset that is saved in a file just like an image or script. Unity will prompt for an animation filename. Once saved, you will see two additional files – an Animator and Animation Controller.
Press play and see your dog walk – look at the inspector to see how the sprite renderer cycles the sprites and an animator is added to your game object.
Two Assets were added to your folder: An Animation and a Controller.
The first asset is called “Walk” and it appears as a Triangle. This is the actual Animation asset that holds all of the images.
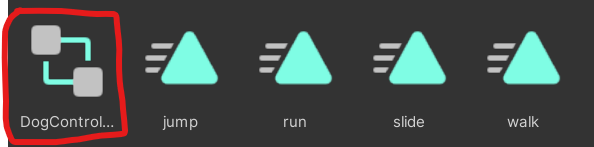
The second asset, “Walk (1)”, appears as a set of 2 boxes connected by lines. This is an Animation Controller. An Animation Controller is used to change between different animations when the game is running. Right now we only have one Animation (“Walk”) in our controller, but you can add as many animations to your character as you would like. For example, we might want to add “Run”, “Jump” and “Idle” Animations to our GameObject, and then switch between them with our single Animation Controller.
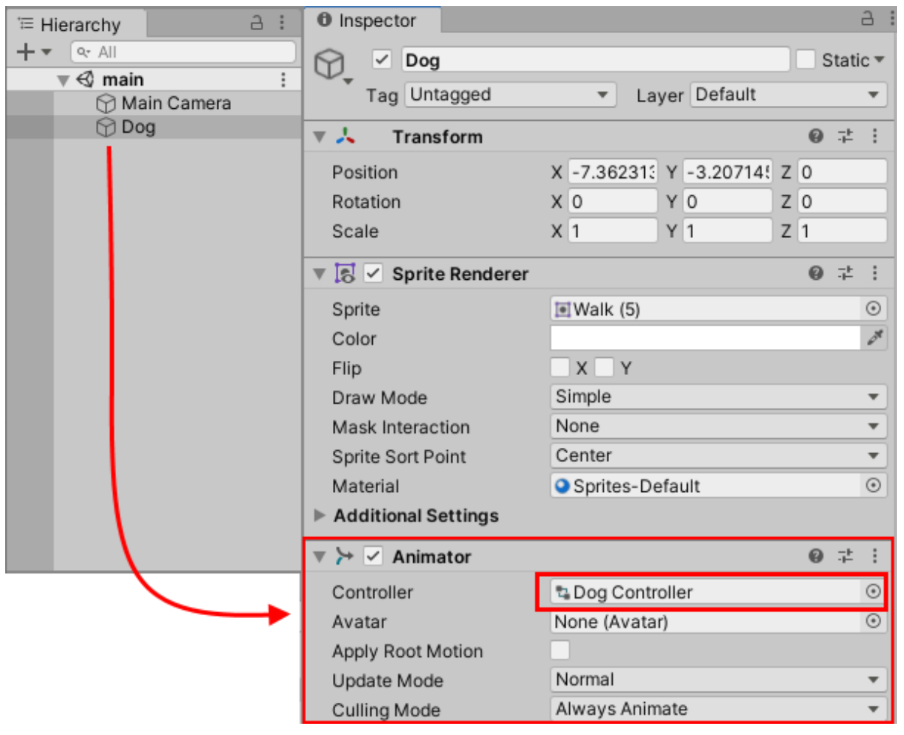
Let’s organize all the animations in an Animations folder. Let’s also rename the animation controller to Dog Controller.
The Animation Controller is a tool that helps to manage multiple animations for one gameObject.
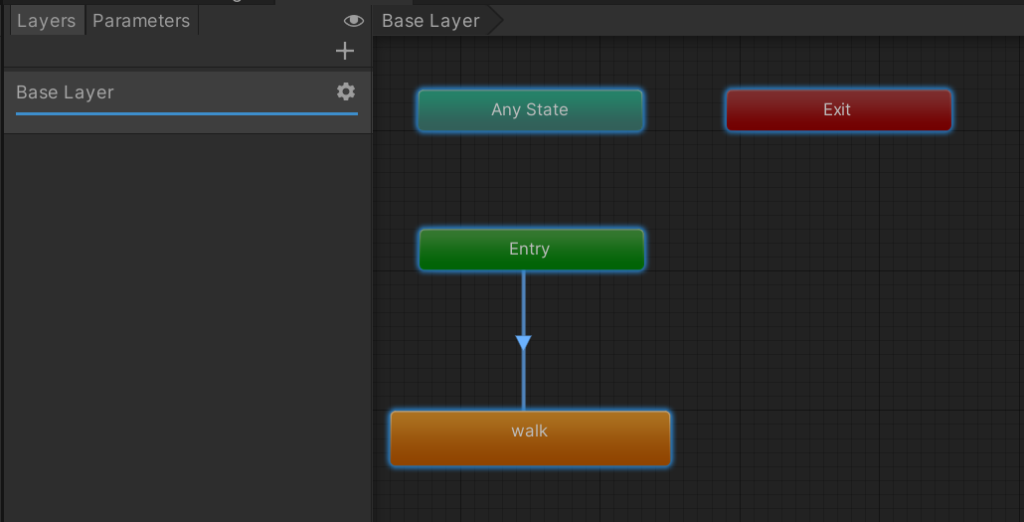
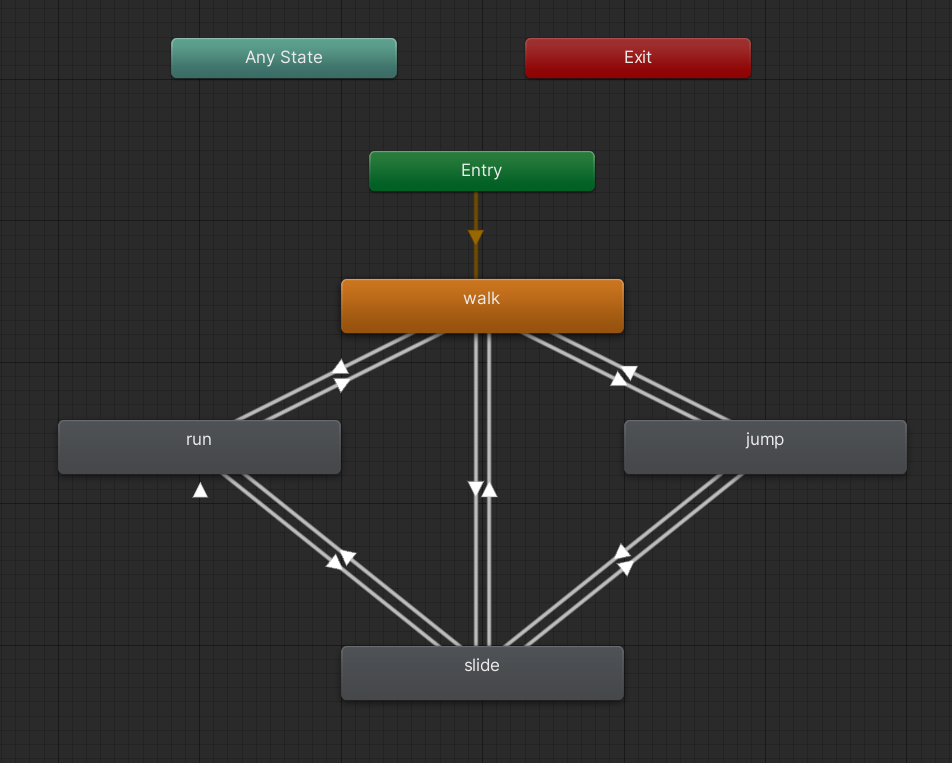
The Animator tab contains boxes that represent each of the animations in the controller. We can make transitions from one state to the next by right clicking on any of the boxes. I’ll demonstrate.
Remember that an Animation Controller is an asset that is linked to a GameObject through an Animator component. If you click on the GameObject in the Hierarchy, you can see the Animator component and the name of the Animation Controller.
Once all the transition arrows are created we can set up transitions so that when certain data conditions are met the condition changes.
Parameters
First, we need to define the data, and then we’ll add the logic to make transitions based on that data. To create some data for use in our transition logic, we will create a parameter or variable in the Animator tab. At the top of that tab is a section that says “Layers” and “Parameters”. Let’s choose parameters.
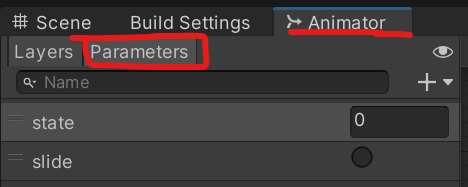
When you choose “Parameters”, you will notice that it simply shows that the “List is Empty”. Let’s fix that. We can click on the plus sign (+) and then choose our data type from the list. For now, we’ll just choose “Int” to make an integer parameter.
Just like any other variable, a parameter needs a name. For this example, we’ll give
our integer parameter the name “state”.
- Walk (state will be equal to 0)
- Run (state will be equal to 1)
- Jump (state will be equal to 2)
- Slide (we’ll create a trigger parameter) a trigger parameter is a animatio that plays one time without looping
Conditions
Once we have defined our animation parameters and how they will be used, we need to tell Unity about the plan! We do this in the Conditions area. Transition arrows use condition statements to decide when to move between states. Let’s set this up now.

The last thing to do is to write up some code to call our parameters. Let’s create a script called “DogScript”. You could also call it player script.
using UnityEngine;
using UnityEngine.InputSystem;

public class DogAnimationControls : MonoBehaviour
{
    private Animator myAnimation;
    private PlayerInput playerInput;

    private void Start()
    {
        myAnimation = GetComponent<Animator>();
        playerInput = GetComponent<PlayerInput>();
    }

    private void Update()
    {
        HandleInput();
    }

    private void HandleInput()
    {
        // Get the actions from the PlayerInput component
        // Note: "Walk", "Run", etc., must match your Input Action names exactly

        if (playerInput.actions["Walk"].IsPressed())
        {
            myAnimation.SetInteger("state", 0);
        }
        else if (playerInput.actions["Run"].IsPressed())
        {
            myAnimation.SetInteger("state", 1);
        }
        else if (playerInput.actions["Jump"].IsPressed())
        {
            myAnimation.SetInteger("state", 2);
        }

        // Triggers are usually best handled via 'wasPressedThisFrame'
        // to avoid triggering every single frame the key is held down
        if (playerInput.actions["Slide"].WasPressedThisFrame())
        {
            myAnimation.SetTrigger("slide");
        }
    }
}
10:50 Morning Break (10 minutes)

11:00 2D Lighting in Unity
Unlike 3D lights, 2D lights are specific components.
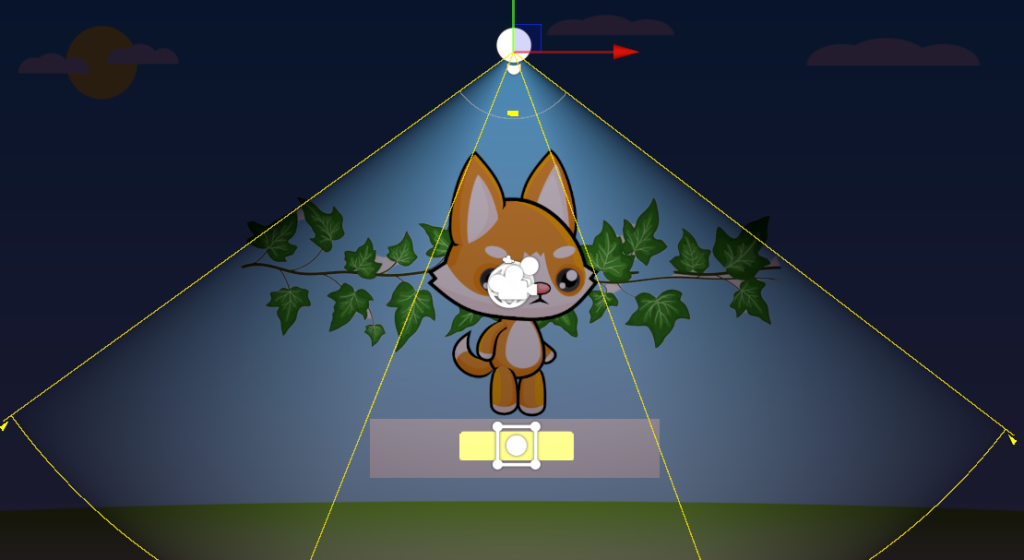
In Unity 6, you right-click the Hierarchy and select Light > 2D
- Global Light: Sets the baseline mood (e.g., dark blue for night)
- Spot Light: A directional cone or circle (e.g., a flashlight)
- Freeform Light: Allows you to edit the shape (vertices) of the light like a polygon
- Sprite Light: Uses a texture shape to define the light (e.g., a star-shaped glow)
The Shadow Caster 2D
This component is added to GameObjects (like walls or trees) to block light.
- Key Property: Use Rendering Layer Mask. This ensures only specific lights (like a torch) cast shadows, while others (like a UI light) do not.
| Term | Definition |
| URP (Universal Render Pipeline) | Unity’s modern graphics pipeline that allows for optimized, high-end 2D lighting. |
| Lit vs. Unlit | Unlit sprites ignore light (always full brightness). Lit sprites react to light sources. |
| Global Light | A light that affects every object on a specific layer, similar to “Ambient” light. |
| Falloff | The gradual fading of light as it moves away from the source. |
| Normal Map | A special texture that tells light how to bounce off a 2D surface to make it look 3D. |
SpotLight Rotation
using UnityEngine;

public class LightRotate : MonoBehaviour
{
    [SerializeField] GameObject spotLight;
    [SerializeField] float rotateSpeed = 20f;
    [SerializeField] float maxRotation = 247f;

    float currentRotation;


    void Update()
    {
        RotateHead();
    }

    void RotateHead()
    {
        currentRotation += Time.deltaTime * rotateSpeed;
        float z = Mathf.PingPong(currentRotation, maxRotation);
        spotLight.transform.localRotation = Quaternion.Euler(0f,0f,z);
    }
}
11:35 Lunch

12:05 Independent Work Session
- Breakout Game
1:00 Afternoon Break (15 minutes)
1:15 Dailies

1:20 Independent Reading
